קל לארגן דפים בעזרת אוספים
אפשר לשמור ולסווג תוכן על סמך ההעדפות שלך.
בדף הזה מוסבר איך ליצור בעיה בכלי למעקב אחרי בעיות של Google.
כדי ליצור בעיה, אתם צריכים להיות מחוברים לחשבון Google. צריך גם הרשאה של יצירת בעיות או ניהול רכיבים ברכיב שבו הבעיה תיווצר. אם יש לכם הרשאה להוספת תגובה לבעיות, תוכלו להגדיר רק את השם והתיאור של הבעיה. אם יש לכם הרשאה של עריכת בעיות, אתם יכולים להגדיר שדות אחרים.
תבניות
תבניות בכלי למעקב אחר בעיות של Google מציינות ערכי ברירת מחדל לשדות בבעיות חדשות ברכיב. לכל רכיב יש תבנית ברירת מחדל, אבל יכולות להיות לו תבניות נוספות בהתאם להגדרות של עובד Google שאחראי על הניהול שלו. משתמשים ציבוריים ומשתמשים שהם שותפים לא יכולים ליצור או לשנות את התבניות שמשויכות לרכיב.
בחירת תבנית
כשיוצרים בעיה ב-Issue Tracker, תבנית ברירת המחדל של הרכיב נבחרת אוטומטית. אם יש תבניות נוספות, אפשר לבחור אותן מהתפריט הנפתח תבנית בדף יצירת בעיה.
כלי המעקב אחר בעיות פותח את הדף Create Issue (יצירת בעיה) והשדה Component (רכיב) מסומן. בשדה הזה מוצגת רשימה נפתחת של רכיבים.
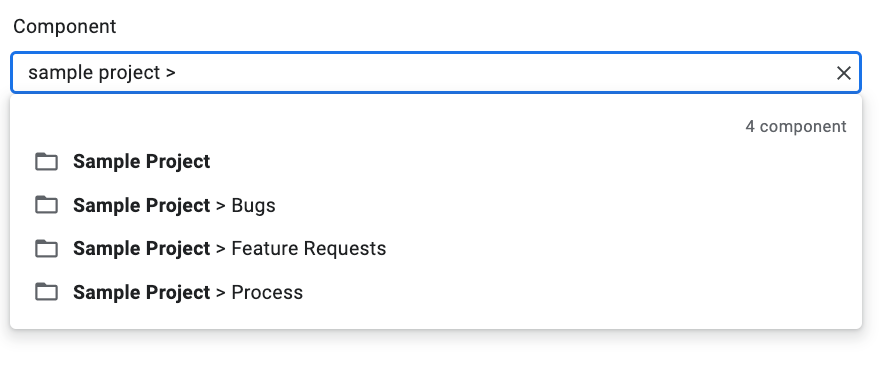
משתמשים ברשימה הנפתחת כדי למצוא את הרכיב שבו רוצים ליצור את הבעיה. אפשר למצוא רק רכיבים שיש לכם הרשאה ליצירת בעיות או ניהול רכיבים.
(אופציונלי) בוחרים תבנית שמתאימה הכי טוב לבעיה שעליה מדווחים. לחלק מהרכיבים יש רק תבנית ברירת מחדל.
מזינים כותרת בשדה כותרת. השם מוצג כשמציגים את פרטי הבעיה, בתוצאות החיפוש, ברשימות הבעיות הדחופות ובמקומות אחרים שבהם מוצגות רשימות של בעיות.
בוחרים עדיפות מהרשימה הנפתחת עדיפות. השדה עדיפות גלוי רק אם יש לכם הרשאה של עריכת בעיות.
בוחרים את סוג הבעיה מהרשימה הנפתחת סוג. השדה סוג
מוצג רק אם יש לכם הרשאה של עריכת בעיות.
(אופציונלי) מציינים מטפל או מוסיפים כתובות אימייל (כולל כתובות של רשימות תפוצה) לרשימות משתפי פעולה וCC. השדות האלה מוצגים רק אם יש לכם הרשאה של עריכת בעיות.
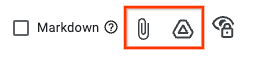
(מומלץ) בשדה Description מזינים תיאור של הבעיה. יכול להיות שהשדה הזה כבר יאוכלס באופן חלקי אם התבנית שנבחרה מספקת טקסט של תיאור. אפשר גם לסמן את האפשרות Markdown כדי לכתוב את התיאור כטקסט Markdown.
(אופציונלי) מוסיפים קבצים מצורפים מהמחשב או ממיקום ב-Drive.
(אופציונלי) ממלאים את השדות המתקדמים של הבעיה.
כדי לראות את השדות האלה, צריך להפעיל את החלונית שדות מתקדמים. החלונית שדות מתקדמים גלויה רק אם יש לכם הרשאה של עריכת בעיות. ברוב המקרים, אפשר לדלג על השדות המתקדמים כשיוצרים בעיה. עם זאת, בחלק מהרכיבים צריך להזין ערכים. במקרה כזה, הקטע שדות מתקדמים מופיע אוטומטית, ושדות החובה מסומנים בכוכבית (*).
לוחצים על הלחצן יצירה כדי לשלוח את הבעיה, או על הלחצן יצירה והתחלה של בעיה נוספת כדי לשלוח את הבעיה ולפתוח דף חדש של יצירת בעיה עם הערכים שבהם השתמשתם כדי ליצור את הבעיה ששלחתם.
יצירת בעיה על סמך בעיה קיימת
אפשר גם ליצור בעיה על סמך בעיה קיימת. השיטה הזו יכולה לחסוך לכם זמן כי היא מאפשרת לאכלס מראש שדות מסוימים באמצעות הבעיה הקיימת.
כדי ליצור בעיה על סמך בעיה קיימת:
פותחים את הבעיה הקיימת.
לוחצים על הלחצן לצד יצירה.
בוחרים מהרשימה הנפתחת איך רוצים ליצור את הגיליון החדש. האפשרויות בתפריט הנפתח משתנות בהתאם לדף שמוצג. הלחצן מוצג רק אם יש לפחות אפשרות אחת זמינה.
יש 7 אפשרויות אפשריות.
אפשרות
תיאור
מופיע כאשר
באותו רכיב
מתחילים בעיה חדשה עם רכיב שמוגדר לרכיב הנוכחי.
(1) ניהול רכיב, (2) הצגת בעיות ברכיב, (3) הצגת בעיה
דומה לגיליון הנוכחי
מתחילים בעיה חדשה עם השדות של הבעיה הנוכחית שהועתקו לבעיה החדשה.
צפייה בבעיה
חסום בגלל בעיה נוכחית
מתחיל בעיה חדשה עם הבעיה הנוכחית כבעיה שחוסמת.
צפייה בבעיה
חסימת הגיליון הנוכחי
מתחיל בעיה חדשה עם הבעיה הנוכחית כבעיה חסומה.
צפייה בבעיה
Parent Of Current
Issue
מתחיל בעיה חדשה עם הבעיה הנוכחית כבעיית צאצא.
צפייה בבעיה
Child Of Current
Issue
מתחיל בעיה חדשה עם הבעיה הנוכחית כבעיית אב.
צפייה בבעיה
באותה רשימת מומלצים
מתחילים בעיה חדשה עם רשימת הבעיות הדחופות הנוכחית שנוספה אליה.
כל הזכויות שמורות. Java הוא סימן מסחרי רשום של Oracle ו/או של השותפים העצמאיים שלה.
עדכון אחרון: 2025-09-08 (שעון UTC).
[null,null,["עדכון אחרון: 2025-09-08 (שעון UTC)."],[[["\u003cp\u003eIssue creation in Google Issue Tracker requires a Google account and specific permissions (Create Issue, Admin, Comment on Issues, or Edit Issues) depending on the desired actions.\u003c/p\u003e\n"],["\u003cp\u003eTemplates, defined by Google employees, provide default field values for new issues within a component and can be selected during issue creation to streamline the process.\u003c/p\u003e\n"],["\u003cp\u003eThe process of creating an issue involves selecting a component, entering details such as title, priority, type, and description, and optionally adding attachments and configuring advanced fields.\u003c/p\u003e\n"],["\u003cp\u003eIssue Tracker provides options to create new issues based on existing ones, leveraging information like component, hotlist, or even copying field values for efficiency.\u003c/p\u003e\n"],["\u003cp\u003eUsers can explore further information regarding issues, components, and managing issues through provided links.\u003c/p\u003e\n"]]],[],null,["This page shows how to create an [issue](../concepts/issues) in Google Issue\nTracker.\n\nTo create an issue, you must be signed in to a Google Account. You also must\nhave **Create Issues** or **Admin Components**\n[permission](../concepts/access-control) for the component where the issue will\nbe created. If you have **Comment on Issues** permission, you may set the issue\ntitle and description only. If you have **Edit Issues** permission, you can set\nother fields.\n\nTemplates\n\nTemplates in Google Issue Tracker specify default values for fields in new\nissues in a [component](../concepts/components). Each component has a default\ntemplate but may have additional templates as configured by the Google employee\nwho is responsible for managing it. Public and partner users cannot create or\nmodify the templates associated with a component.\n\nChoose a template\n\nWhen you [create an issue](../guides/create-issue-ui) in Issue Tracker, the\ndefault template for the component is automatically selected. If additional\ntemplates are available, you can select them from the **Template** drop-down\nlist on the **Create Issue** page.\n\nWhen you select a template, the fields in the page are automatically populated\nwith the default values defined.\n\nCreate an issue\n\nTo create an issue:\n\n1. [Open Issue Tracker](../guides/access-ui) in your web browser.\n\n2. Click **Create Issue**.\n\n Issue Tracker opens the **Create Issue** page and has the **Component**\n field selected. This field shows a drop-down list of components.\n\n3. Use the drop-down list to [find the component](/issue-tracker/guides/find-a-component) where you want to create\n the issue. You can only find components where you have **Create Issues** or\n **Admin Components** permission.\n\n4. (Optional) Choose a [template](../concepts/templates) that best applies to\n the issue you are reporting. Some components only have a default template.\n\n5. Enter a [title](../references/glossary-of-fields#title) in the **Title** field. The title is displayed when you\n view the details of the issue, as well as in search results, hotlists and\n other places where you are viewing lists of issues.\n\n6. Select a [priority](../references/glossary-of-fields#priority) from the **Priority** drop-down list. The\n **Priority** field is only visible if you have **Edit Issues** permission.\n\n7. Select the issue [type](../references/glossary-of-fields#type) from the **Type** drop-down list. The **Type**\n field is only visible if you have **Edit Issues** permission.\n\n8. (Optional) Designate an [assignee](../references/glossary-of-fields#assignee) or add email addresses (including\n mailing list addresses) to the [Collaborators](../references/glossary-of-fields#collaborators) and [CC](../references/glossary-of-fields#cc) lists. These\n fields are only visible if you have **Edit Issues** permission.\n\n | Depending on your [email notification settings](/issue-tracker/guides/set-notification-preferences), you might need to add yourself to the CC list to receive notifications.\n9. (Recommended) Enter a [description](../references/glossary-of-fields#description) for the issue in the **Description**\n field. This field might already be partially populated for you if\n description text is provided by the selected template. You can also check\n the **Markdown** option to write the description as\n [markdown](https://commonmark.org) text.\n\n10. (Optional) Add attachments from your computer or from a Drive location.\n\n11. (Optional) Fill in the advanced fields for the issue.\n\n You can view these fields by toggling the **Advanced fields** panel. The\n **Advanced fields** panel is only visible if you have **Edit Issues**\n permission. In most cases, you can skip advanced fields when creating an\n issue. However, some components require you to enter values for them. If\n this is the case, the **Advanced fields** section appears automatically, and\n the required fields are marked with an asterisk (\\*).\n\n12. Click the **Create** button to submit the issue or click **Create \\& Start\n Another** to submit the issue and open a new **Create Issue** page\n pre-populated with the values used for the issue you just created.\n\n| Hover over the name of a field in the Create Issue page to view a field description.\n\nCreate an issue based on an existing one\n\nYou can also create an issue based on an existing one. This method can save you\ntime by using the existing issue to pre-fill certain fields.\n\nTo create an issue based on an existing one:\n\n1. Open the existing issue.\n\n2. Click the button next to **Create**.\n\n3. Choose how you want to create the new issue from the drop-down list. The\n options in the drop-down list vary depending on the page that you are\n viewing. The button only becomes visible if there is at least one option\n available.\n\nThere are 7 possible options.\n\n| Option | Description | Appears when |\n|------------------------------|----------------------------------------------------------------------------------|-----------------------------------------------------------------------------------|\n| **In Same Component** | Starts a new issue with component set to the current component. | (1) Managing a component, (2) Viewing issues in a component, (3) Viewing an issue |\n| **Similar To Current Issue** | Starts a new issue with the fields of the current issue copied to the new issue. | Viewing an issue |\n| **Blocked By Current Issue** | Starts a new issue with the current issue as a blocking issue. | Viewing an issue |\n| **Blocking Current Issue** | Starts a new issue with the current issue as a blocked issue. | Viewing an issue |\n| **Parent Of Current Issue** | Starts a new issue with the current issue as a child issue. | Viewing an issue |\n| **Child Of Current Issue** | Starts a new issue with the current issue as a parent issue. | Viewing an issue |\n| **In Same Hotlist** | Starts a new issue with the current hotlist added to it. | (1) Managing a hotlist, (2) Viewing issues under a hotlist |\n\n| The **Similar To Current Issue** option does not copy the changelist, duplicate issue ID, CC or reporter fields from the original issue.\n\nWhat's next\n\n- [Learn more about issues](../concepts/issues)\n- [Learn more about components](../concepts/components)\n- [View and edit issues](/issue-tracker/guides/edit-issue-ui)"]]