
このページでは、Maps SDK for iOS 用ユーティリティ ライブラリで使用できるヒートマップ ユーティリティについて説明します。ヒートマップは、マップ上のデータポイントの分布と密度を表すのに役立ちます。
この動画では、マップ上に多数のデータポイントが必要なデータの場合に、マーカーの代わりとしてヒートマップを使用する方法を説明します。
ヒートマップを使うと、マップ上のデータポイントの分布と相対密度を閲覧者にわかりやすく示すことができます。ヒートマップでは、各位置にマーカーを配置するのではなく、色を使用してデータの分布を表します。
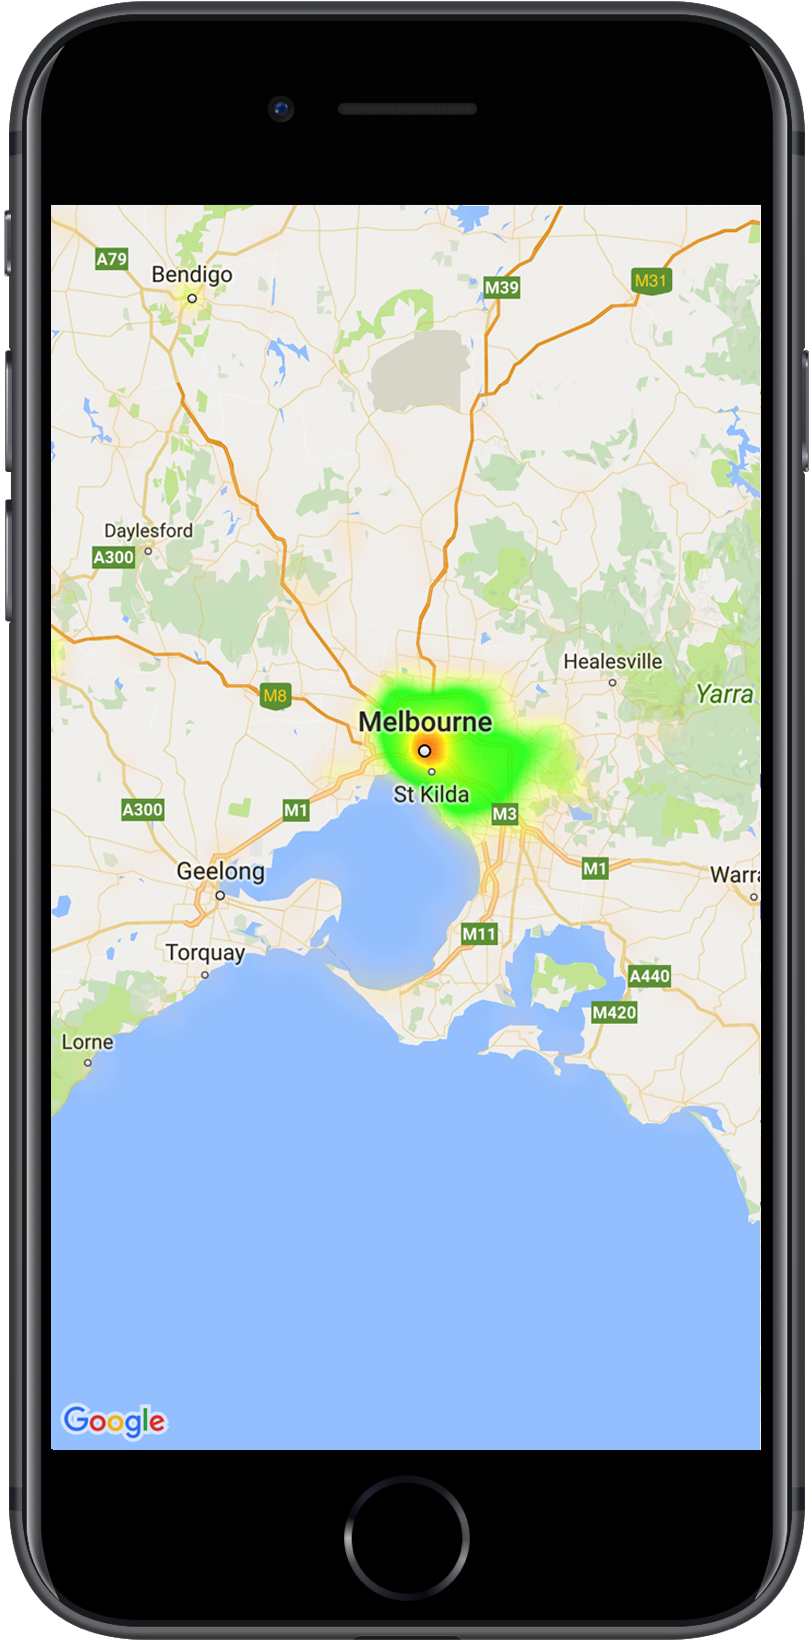
次の例では、オーストラリアのビクトリアにおいて、警察署の密度が高い地域が赤で表されています。
ライブラリをまだセットアップしていない場合は、このページの残りを読む前に、設定 ガイドに従ってセットアップしてください。
単純なヒートマップを追加する
マップにヒートマップを追加するには、関心対象地域それぞれを示す座標のデータセットが必要です。まず、
GMUHeatmapTileLayer インスタンスを作成し、map プロパティを GMSMapView に設定します。
ヒートマップを操作する前に基本地図が読み込まれるように、アプリの viewDidLoad() 関数でこれを行います。次に、GMUWeightedLatLng オブジェクトのコレクションを GMUHeatmapTileLayer インスタンスに渡します。
ユーティリティには、GMUWeightedLatLng オブジェクトのコレクションを受け取る GMUHeatmapTileLayer
クラスが用意されています。これにより、さまざまなズームレベルのタイル画像が、指定された半径、グラデーション、不透明度のオプションに基づいて作成されます。
次に、各ステップの詳細を示します。
GMUHeatmapTileLayerインスタンスを作成し、mapプロパティをGMSMapViewに設定します(アプリのviewDidLoad()関数でこれを行います)。GMUWeightedLatLngオブジェクトのコレクションをGMUHeatmapTileLayerインスタンスに渡します。GMUHeatmapTileLayer.mapを呼び出し、地図ビューを渡します。Swift
class Heatmap: UIViewController {

  private var mapView: GMSMapView!
  private var heatmapLayer: GMUHeatmapTileLayer!

  override func viewDidLoad() {
    super.viewDidLoad()
    heatmapLayer = GMUHeatmapTileLayer()
    heatmapLayer.map = mapView
  }

  // ...

  func addHeatmap() {

    // Get the data: latitude/longitude positions of police stations.
    guard let path = Bundle.main.url(forResource: "police_stations", withExtension: "json") else {
      return
    }
    guard let data = try? Data(contentsOf: path) else {
      return
    }
    guard let json = try? JSONSerialization.jsonObject(with: data, options: []) else {
      return
    }
    guard let object = json as? [[String: Any]] else {
      print("Could not read the JSON.")
      return
    }

    var list = [GMUWeightedLatLng]()
    for item in object {
      let lat = item["lat"] as! CLLocationDegrees
      let lng = item["lng"] as! CLLocationDegrees
      let coords = GMUWeightedLatLng(
        coordinate: CLLocationCoordinate2DMake(lat, lng),
        intensity: 1.0
      )
      list.append(coords)
    }

    // Add the latlngs to the heatmap layer.
    heatmapLayer.weightedData = list
  }
}
Objective-C
@implementation Heatmap {
  GMSMapView *_mapView;
  GMUHeatmapTileLayer *_heatmapLayer;
}

- (void)viewDidLoad {
  [super viewDidLoad];
  _heatmapLayer = [[GMUHeatmapTileLayer alloc] init];
  _heatmapLayer.map = _mapView;
}

// ...

- (void) addHeatmap {

  // Get the data: latitude/longitude positions of police stations.
  NSURL *path = [NSBundle.mainBundle URLForResource:@"police_stations" withExtension:@"json"];
  NSData *data = [NSData dataWithContentsOfURL:path];
  NSArray *json = [NSJSONSerialization JSONObjectWithData:data options:0 error:nil];

  NSMutableArray<GMUWeightedLatLng *> *list = [[NSMutableArray alloc] init];
  [json enumerateObjectsUsingBlock:^(id  _Nonnull obj, NSUInteger idx, BOOL * _Nonnull stop) {
    NSDictionary *item = (NSDictionary *)obj;
    CLLocationDegrees lat = [(NSNumber *) [item valueForKey:@"lat"] doubleValue];
    CLLocationDegrees lng = [(NSNumber *) [item valueForKey:@"lng"] doubleValue];
    GMUWeightedLatLng *coords = [[GMUWeightedLatLng alloc] initWithCoordinate:CLLocationCoordinate2DMake(lat, lng)
                                                                    intensity:1.0];
    [list addObject:coords];
  }];


  // Add the latlngs to the heatmap layer.
  _heatmapLayer.weightedData = list;
}
@end
この例では、データは JSON ファイル police_stations.json に保存されています。
ファイルの抜粋を以下に示します。
[
{"lat" : -37.1886, "lng" : 145.708 } ,
{"lat" : -37.8361, "lng" : 144.845 } ,
{"lat" : -38.4034, "lng" : 144.192 } ,
{"lat" : -38.7597, "lng" : 143.67 } ,
{"lat" : -36.9672, "lng" : 141.083 }
]
ヒートマップをカスタマイズする
ヒートマップには、カスタマイズ可能なプロパティがいくつかあります。オプションは、GMUHeatmapTileLayer
インスタンスを最初に作成するときに設定することも、オプションに新しい値を設定することでいつでも設定することもできます。
以下のオプションを使用できます。
Radius: ピクセル単位で示される、ヒートマップに適用されるガウスぼかしのサイズ。デフォルト値は 20 です。10 から 50 の間である必要があります。半径を設定するには、
GMUHeatmapTileLayer.radiusを使用します。Gradient: ヒートマップが色マップを生成するために使用する、最低強度から最高強度までの色の範囲。
GMUGradientは、色を含む整数配列と、各色の開始点を示す浮動小数配列を使用して作成されます。開始点は最大強度に対する割合で示され、0 から 1 の間の小数として表されます。単色のグラデーションでは色を 1 つのみ指定する必要があり、複数色のグラデーションでは 2 色以上指定する必要があります。カラーマップは、これらの色間の補間を使用して生成されます。デフォルトのグラデーションでは 2 色が使用されます。colorMapSizeパラメータは、グラデーションのステップ数を定義します。数が多いほどグラデーションが滑らかになり、数が少ないほど等高線グラフのようなシャープな遷移になります。グラデーションを設定するには、GMUHeatmapTileLayer.gradientを使用します。Opacity: これはヒートマップ レイヤ全体の不透明度で、範囲は 0 から 1 です。デフォルトは 0.7 です。不透明度の値を設定するには、
GMUHeatmapTileLayer.opacityを使用します。
たとえば、次のように Gradient を作成します。
Swift
let gradientColors: [UIColor] = [.green, .red]
let gradientStartPoints: [NSNumber] = [0.2, 1.0]
heatmapLayer.gradient = GMUGradient(
  colors: gradientColors,
  startPoints: gradientStartPoints,
  colorMapSize: 256
)
Objective-C
NSArray<UIColor *> *gradientColors = @[UIColor.greenColor, UIColor.redColor];
NSArray<NSNumber *> *gradientStartPoints = @[@0.2, @1.0];
_heatmapLayer.gradient = [[GMUGradient alloc] initWithColors:gradientColors
                                                 startPoints:gradientStartPoints
                                                colorMapSize:256];
既存のヒートマップの不透明度を変更するには、次のようにします。
Swift
heatmapLayer.opacity = 0.7
Objective-C
_heatmapLayer.opacity = 0.7;
既存のオプションを更新する
すでに設定されているオプションを更新する手順は次のとおりです。
- オプションを目的の値に更新します。
GMUHeatmapTileLayer.clearTileCache()を呼び出します。
データセットを変更する
ヒートマップの基となるデータセットを変更するには:
- データの収集を更新します。
GMUHeatmapTileLayer.weightedDataを使用して、GMUWeightedLatLngの配列を渡します。 GMUHeatmapTileLayer.clearTileCache()を呼び出します。
ヒートマップを削除する
ヒートマップを削除するには、GMUHeatmapTileLayer.map を呼び出し、nil を渡します。
Swift
heatmapLayer.map = nil
Objective-C
_heatmapLayer.map = nil;
デモアプリを見る
ヒートマップ実装の別の例については、ユーティリティ ライブラリに付属のデモアプリにある HeatmapViewController
をご覧ください。
また、設定ガイドでは、デモアプリを実行する方法を
説明しています。