이 가이드에는 광고 통합 과정에서 테스트 광고를 사용 설정하는 방법이 나와 있습니다. 개발 중에는 테스트 광고를 사용하여 광고를 클릭해도
Google 광고주에게
비용이 청구되지 않게 하는 것이 중요합니다. 테스트 모드가 아닌 상태에서 광고를 너무 많이 클릭하면
무효 활동으로 계정이 신고될 수 있습니다.
프로덕션용 광고로 더욱 엄격한 테스트를 진행하려는 경우 이제 기기를
테스트 기기로 구성하고 AdMob UI에서 생성한 자체 광고 단위 ID를
사용할 수 있습니다. 테스트 기기는 AdMob UI에서 추가하거나 Google 모바일
광고 SDK를 통해 프로그래매틱 방식으로 추가할 수 있습니다.
기기를 테스트 기기로 추가하려면 아래의 단계를 따르세요.
AdMob UI에서 테스트 기기 추가
간단한 비프로그래매틱 방식으로 테스트 기기를 추가하고 신규 또는 기존 앱 빌드를 테스트하려면
AdMob UI를 사용하세요. 방법
알아보기
테스트 기기를 프로그래매틱 방식으로 추가
개발하면서 내 앱에서 광고를 테스트하려는 경우에는 아래 단계에
따라 테스트 기기를 프로그래매틱 방식으로 등록하세요.
모바일 광고 SDK로 구성된 앱을 실행하고, 위에 나온 테스트 광고 단위 ID 중 하나를
사용하여 광고를 요청하세요.
코드 목록
...privatevoidRequestBanner(){#if UNITY_ANDROIDstringadUnitId="ca-app-pub-3940256099942544/6300978111";#elif UNITY_IPHONEstringadUnitId="ca-app-pub-3940256099942544/2934735716";#elsestringadUnitId="unexpected_platform";#endif// Create a 320x50 banner at the top of the screen.bannerView=newBannerView(adUnitId,AdSize.Banner,AdPosition.Top);// Create an empty ad request.AdRequestrequest=newAdRequest();// Load the banner with the request.bannerView.LoadAd(request);}
콘솔 또는 logcat 출력에서 다음과 같은 메시지를 확인하세요.
Android
I/Ads: Use
RequestConfiguration.Builder
.setTestDeviceIds(Arrays.asList("33BE2250B43518CCDA7DE426D04EE231"))
to get test ads on this device.
iOS
<Google> To get test ads on this device, set:
GADMobileAds.sharedInstance.requestConfiguration.testDeviceIdentifiers =
@[ @"2077ef9a63d2b398840261c8221a0c9b" ];
영숫자 테스트 기기 ID를 클립보드로 복사하세요.
코드를 수정하여 테스트 기기 ID를 RequestConfiguration.TestDeviceIds 목록에 추가합니다.
앱을 다시 실행하세요. 기기를 테스트 기기로 올바르게 추가했다면
배너 광고, 전면 광고 및 보상형 광고의 상단에
테스트 광고 라벨이 표시됩니다.
이러한 테스트 광고 라벨이 표시된 광고는 클릭해도 문제가 발생하지 않습니다. 테스트 광고에
대한 요청, 노출 및 클릭은 계정 보고서에
반영되지 않습니다.
기기가 테스트 기기로 등록되었으면 테스트 adUnitID를 자체적인 adUnitID로 교체하여
더욱 현실적인 테스트 광고를
받을 수 있습니다.
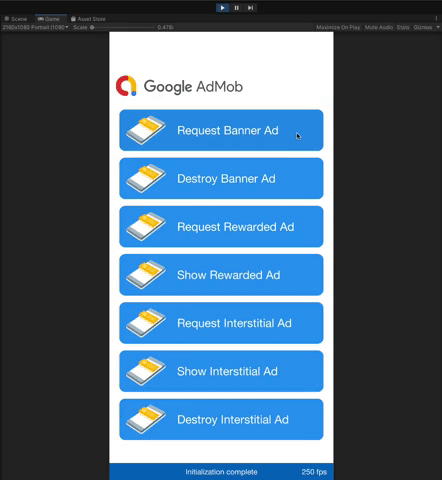
Unity 편집기로 테스트
버전 5.4.0부터는 Unity 편집기에서 광고를
직접 테스트할 수 있습니다. 편집기는 Prefab 이미지를 추가하여 모바일 플랫폼에서 실제 광고가
작동하는 방식과 비슷한 경험을 제공합니다.
미디에이션을 이용한 테스트
Google의 샘플 광고 단위에는 Google 광고만 표시됩니다. 미디에이션 구성을 테스트하려면 테스트 기기 사용 방식을
이용해야 합니다.
미디에이션된 광고에서는 테스트 광고 라벨을 렌더링하지 않습니다. 각 네트워크에서 내 계정이 무효 활동으로 신고되지 않도록
미디에이션 네트워크별로 테스트 광고를 사용 설정해야 합니다. 자세한 내용은
네트워크별 미디에이션 가이드를 참조하세요.
미디에이션 광고 네트워크 어댑터가 테스트 광고를 지원하는지가 확실하지 않으면
개발 중에 해당 네트워크에서 게재된 광고는 클릭하지 않는 것이 좋습니다. 모든 광고 형식에서
MediationAdapterClassName() 메서드를 사용하여 현재 광고를 게재한 광고 네트워크를
확인할 수 있습니다.
[null,null,["최종 업데이트: 2025-08-18(UTC)"],[[["\u003cp\u003eThis guide explains how to enable test ads during development to avoid invalid activity flags on your account.\u003c/p\u003e\n"],["\u003cp\u003eYou can enable test ads by using Google-provided sample ad units or by configuring your device as a test device.\u003c/p\u003e\n"],["\u003cp\u003eSample ad units are not associated with your AdMob account and serve test creatives, while test devices allow using your own ad unit IDs with production-like ads.\u003c/p\u003e\n"],["\u003cp\u003eRemember to replace test ad unit IDs with your own before publishing and remove test device configurations to serve live ads.\u003c/p\u003e\n"],["\u003cp\u003eMediation networks may require separate test ad configurations, and clicking on ads from unsupported networks should be avoided during development.\u003c/p\u003e\n"]]],["To enable test ads, use Google's sample ad units, replacing them with your own before publishing. Alternatively, register your device as a test device through the AdMob UI or programmatically. Programmatic registration involves requesting ads with sample IDs, retrieving your device ID from the console, and adding it to your `RequestConfiguration.TestDeviceIds` list. Test ads will display a \"Test Ad\" label. For mediation testing, use the device registration method, noting mediated ads lack the label.\n"],null,["Select platform: [Android](/admob/android/test-ads \"View this page for the Android platform docs.\") [iOS](/admob/ios/test-ads \"View this page for the iOS platform docs.\") [Unity](/admob/unity/test-ads \"View this page for the Unity platform docs.\") [Flutter](/admob/flutter/test-ads \"View this page for the Flutter platform docs.\")\n\n\u003cbr /\u003e\n\nThis guide explains how to enable test ads in your ads integration. It's\nimportant to enable test ads during development so that you can click on them\nwithout charging Google advertisers. If you click on too many ads without being\nin test mode, you risk your account being flagged for invalid activity.\n\nThere are two ways to get test ads:\n\n1. Use one of Google's sample ad units.\n\n2. Use your own ad unit and enable test devices.\n\nPrerequisites\n\n- Complete [Get Started](/admob/unity/quick-start).\n\n- Import the Google Mobile Ads Unity plugin to your Unity app.\n\nSample ad units\n\nThe quickest way to enable testing is to use Google-provided test ad units.\nThese ad units are not associated with your AdMob account, so there's no risk\nof your account generating invalid traffic when using these ad units.\n\nIt is important to note that different Google-provided test ad units should be\nused depending on the platform. You'll need to use an iOS test ad unit for\nmaking test ad requests on iOS and an Android test ad unit for making requests\non Android.\n| **Key Point:** Make sure you replace these test IDs with your own ad unit ID before publishing your app.\n\nHere are sample ad units for each format on both Android and iOS: \n\nAndroid\n\n| Ad format | Sample ad unit ID |\n|------------------------------------------------------------------------|------------------------------------------|\n| [App open](/admob/unity/app-open-ads#create) | `ca-app-pub-3940256099942544/9257395921` |\n| [Banner](/admob/unity/banner#create_a_bannerview) | `ca-app-pub-3940256099942544/6300978111` |\n| [Interstitial](/admob/unity/interstitial#create_an_interstitial_ad) | `ca-app-pub-3940256099942544/1033173712` |\n| [Rewarded](/admob/unity/rewarded#load_an_ad) | `ca-app-pub-3940256099942544/5224354917` |\n| [Rewarded Interstitial](/admob/unity/rewarded-interstitial#load_an_ad) | `ca-app-pub-3940256099942544/5354046379` |\n| [Native](/admob/unity/native-advanced-unified#load_native_ad_formats) | `ca-app-pub-3940256099942544/2247696110` |\n\niOS\n\n| Ad format | Sample ad unit ID |\n|------------------------------------------------------------------------|------------------------------------------|\n| [App open](/admob/unity/app-open-ads#create) | `ca-app-pub-3940256099942544/5575463023` |\n| [Banner](/admob/unity/banner#create_a_bannerview) | `ca-app-pub-3940256099942544/2934735716` |\n| [Interstitial](/admob/unity/interstitial#create_an_interstitial_ad) | `ca-app-pub-3940256099942544/4411468910` |\n| [Rewarded](/admob/unity/rewarded#load_an_ad) | `ca-app-pub-3940256099942544/1712485313` |\n| [Rewarded Interstitial](/admob/unity/rewarded-interstitial#load_an_ad) | `ca-app-pub-3940256099942544/6978759866` |\n| [Native](/admob/unity/native-advanced-unified#load_native_ad_formats) | `ca-app-pub-3940256099942544/3986624511` |\n\nThese ad units point to specific test creatives.\n\nEnable test devices\n\nIf you want to do more rigorous testing with production-looking ads, you can\nnow configure your device as a test device and use your own ad unit IDs that\nyou've created in the AdMob UI. Test devices can either be added in the AdMob UI\nor programmatically using Google Mobile Ads SDK.\n\nFollow the steps below to add your device as a test device.\n| **Key Point:** Android emulators and iOS simulators are automatically configured as test devices.\n\nAdd your test device in the AdMob UI\n\nFor a simple, non-programmatic way to add a test device and test new or existing\napp builds, use the AdMob UI. [Learn\nhow](//support.google.com/admob/answer/9691433).\n| **Key Point:** New test devices typically start serving test ads in your app within 15 minutes, but it can also take up to 24 hours.\n\nAdd your test device programmatically\n\nIf you want to test ads in your app as you're developing, follow the\nsteps below to programmatically register your test device.\n\n1. Run an app configured with Google Mobile Ads SDK and make an ad request\n using one of the test ad unit IDs listed above.\n [Code listing](/admob/unity/banner#create_a_bannerview).\n\n ```c#\n ...\n private void RequestBanner()\n {\n #if UNITY_ANDROID\n string adUnitId = \"ca-app-pub-3940256099942544/6300978111\";\n #elif UNITY_IPHONE\n string adUnitId = \"ca-app-pub-3940256099942544/2934735716\";\n #else\n string adUnitId = \"unexpected_platform\";\n #endif\n\n // Create a 320x50 banner at the top of the screen.\n bannerView = new BannerView(adUnitId, AdSize.Banner, AdPosition.Top);\n // Create an empty ad request.\n AdRequest request = new AdRequest();\n // Load the banner with the request.\n bannerView.LoadAd(request);\n }\n ```\n2. Check the console or logcat output for a message that looks like this:\n\n Android \n\n ```\n I/Ads: Use\n RequestConfiguration.Builder\n .setTestDeviceIds(Arrays.asList(\"33BE2250B43518CCDA7DE426D04EE231\"))\n to get test ads on this device.\n ```\n\n iOS \n\n ```\n \u003cGoogle\u003e To get test ads on this device, set:\n GADMobileAds.sharedInstance.requestConfiguration.testDeviceIdentifiers =\n @[ @\"2077ef9a63d2b398840261c8221a0c9b\" ];\n ```\n3. Copy your alphanumeric test device ID to your clipboard.\n\n4. Modify your code to add the test device IDs to your\n `RequestConfiguration.TestDeviceIds` list.\n\n List\u003cstring\u003e testDeviceIds = new List\u003cstring\u003e();\n testDeviceIds.Add(\"\u003cvar translate=\"no\"\u003eTEST_DEVICE_ID\u003c/var\u003e\");\n\n RequestConfiguration requestConfiguration = new RequestConfiguration\n {\n TestDeviceIds = testDeviceIds\n }; \n https://github.com/googleads/googleads-mobile-unity/blob/0f0ef22a4a4b1894951539831f9e3947ff634a75/samples/HelloWorld/Snippets/RequestConfigurationSnippets.cs#L18-L24\n\n Replace \u003cvar readonly=\"true\" translate=\"no\"\u003eTEST_DEVICE_ID\u003c/var\u003e with your own test device\n ID.\n | Be sure to remove the code that sets these test devices before you release your app.\n5. Set `requestConfiguration` globally to `MobileAds`.\n\n MobileAds.SetRequestConfiguration(requestConfiguration); \n https://github.com/googleads/googleads-mobile-unity/blob/0f0ef22a4a4b1894951539831f9e3947ff634a75/samples/HelloWorld/Snippets/RequestConfigurationSnippets.cs#L28-L28\n\n6. Re-run your app. If you correctly added your device as a test device, you\n will see a **Test Ad** label centered at the top of banner, interstitial,\n and rewarded ads:\n\n Ads with this **Test Ad** label are safe to click. Any requests,\n impressions, and clicks on test ads do not show up in your account's\n reports.\n | Mediated ads DO NOT render a **Test Ad** label.\n7. Now that your device is registered as a test device, you can begin receiving\n more realistic test ads by replacing the test `adUnitID` with your own\n `adUnitID`.\n\nTesting with the Unity Editor\n\nBeginning with version 5.4.0, you can test your ads directly in the\nUnity editor. The editor will add a Prefab image giving a similar experience to\nhow actual ads will behave on a mobile platform.\n\n| **Note:** Because the mock ads are prefab objects, they will appear \"under\" your GUI in the Unity Editor. When you export to a mobile platform, however, ads render on top of any game views.\n\nTesting with mediation\n\nGoogle's sample ad units only show Google Ads. To test your mediation\nconfiguration, you must use the [enable test devices](#enable_test_devices)\napproach.\n\nMediated ads do *NOT* render a **Test Ad** label. You are responsible for\nensuring that test ads are enabled for each of your mediation networks so these\nnetworks don't flag your account for invalid activity. See each network's\nrespective [mediation guide](/admob/unity/mediation) for more information.\n\nIf you aren't sure whether a mediation ad network adapter supports test ads, it\nis safest to avoid clicking on ads from that network during development. You\ncan use the `MediationAdapterClassName()` method on any of the ad formats to\nfigure out which ad network served the current ad."]]