界面元素
使用集合让一切井井有条
根据您的偏好保存内容并对其进行分类。
设计界面组件,打造沉浸式体验,从而在视觉上将真实空间与虚拟空间融为一体。
打造简洁明了的界面,无缝配合您正在构建的沉浸式体验。
接口
打造易于使用的沉浸式体验
让用户沉浸其中,不干扰用户。
尽量减少干扰您的 AR 世界。先让用户进入体验,然后让它们离开。
除非用户明确选择,否则请避免使用弹出式窗口和全屏包版。按钮、2D 提醒和通知可能会分散用户注意力,让他们无法观看您在其周围创建的 3D 世界。而应让用户专注于场景本身。
持续的 2D 叠加层也会破坏用户的沉浸感。它不断地提醒人们看到的世界并不完全真实。
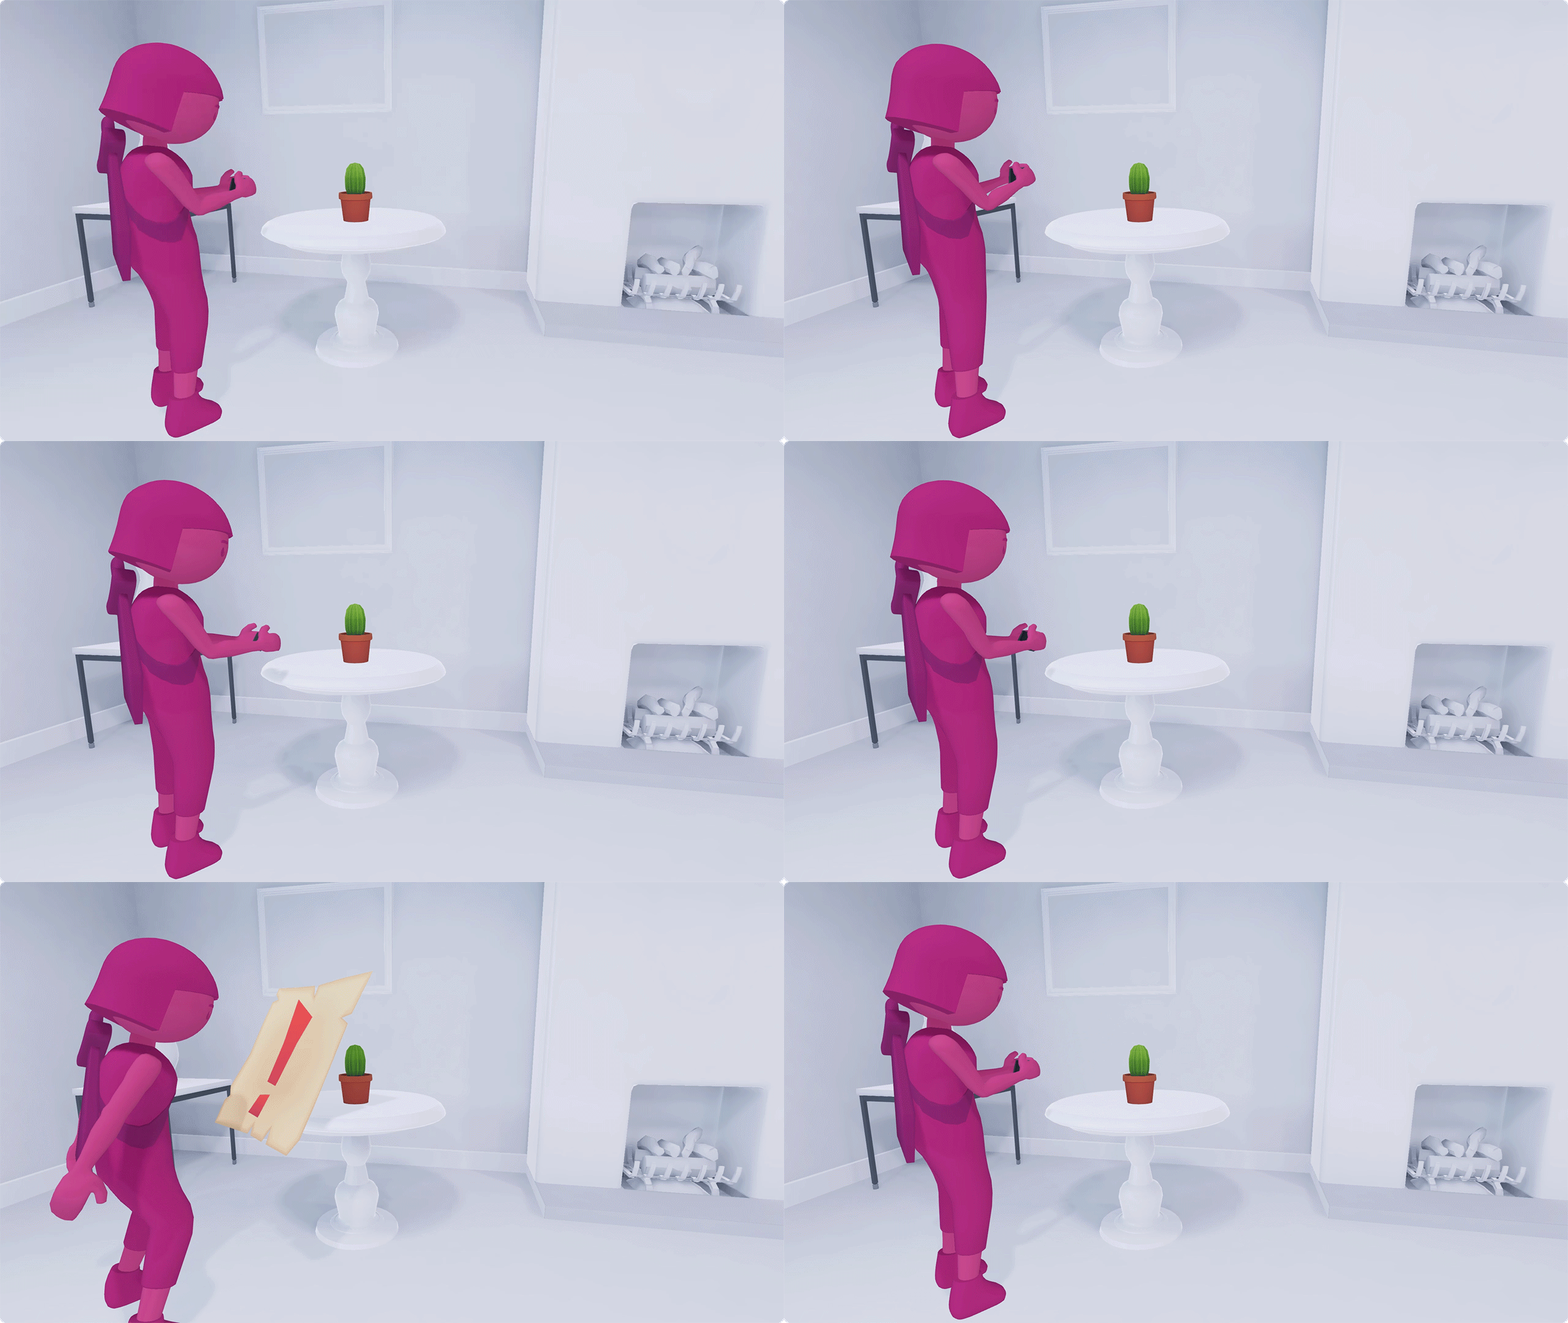
突然的弹出式窗口和快速切换可能会破坏沉浸式 AR 体验。
让控制变得如此简单,用户不必费心去想它们的含义
最好能让用户专注于 AR 体验本身。不过,有时应用需要有屏幕上的控件。
在这种情况下,请尽可能简化控制。理想情况下,用户应该能够在不看操作的情况下触发操作。想一想手机上的相机按钮。它很大,没有标签,您几乎不费吹灰之力即可点按它。
保持体验的连续性。尽量避免过于频繁地将用户带离场景。例如,如果用户需要选择、自定义或共享 AR 对象,请设法找到无需离开 AR 即可完成此操作的方法。
新手入门和说明
在体验中提供新手入门流程
让用户能够快速启动 AR。让教程成为主要体验流程的一部分。避免一次性教用户所有关键任务或机制。
而是应当展示如何在游戏中执行这些任务。这样,用户就不会收到过多信息,并且能够将有用的说明和提示与手头的任务关联起来。
直观地引导用户
结合使用视觉提示、动作和动画来指导用户。尽可能多地说明和使用应用内体验。文字说明可能会让用户离开游戏体验,使用户难以记住他们应该做什么。
例如,如果您希望用户执行滑动操作,可为其提供箭头或手形图标,而不是显示“滑动”一词。
使用熟悉的界面模式
充分利用用户知识。如果某项操作(例如点按或拖动)有标准的用户体验互动模型,请使用该模型!您无需教用户执行简单任务的全新方式,并且可以直接进入体验的重要环节。
横向和纵向
支持竖屏和横屏模式。如果无法做到这一点,请选择最适合您体验的方法。
同时支持这两种模式可以打造沉浸感更强的体验,并提高用户舒适度。
考虑每种模式的摄像头和按钮位置。注意在每种模式下相机定位如何影响深度传感、空间感知和精确的表面测量。
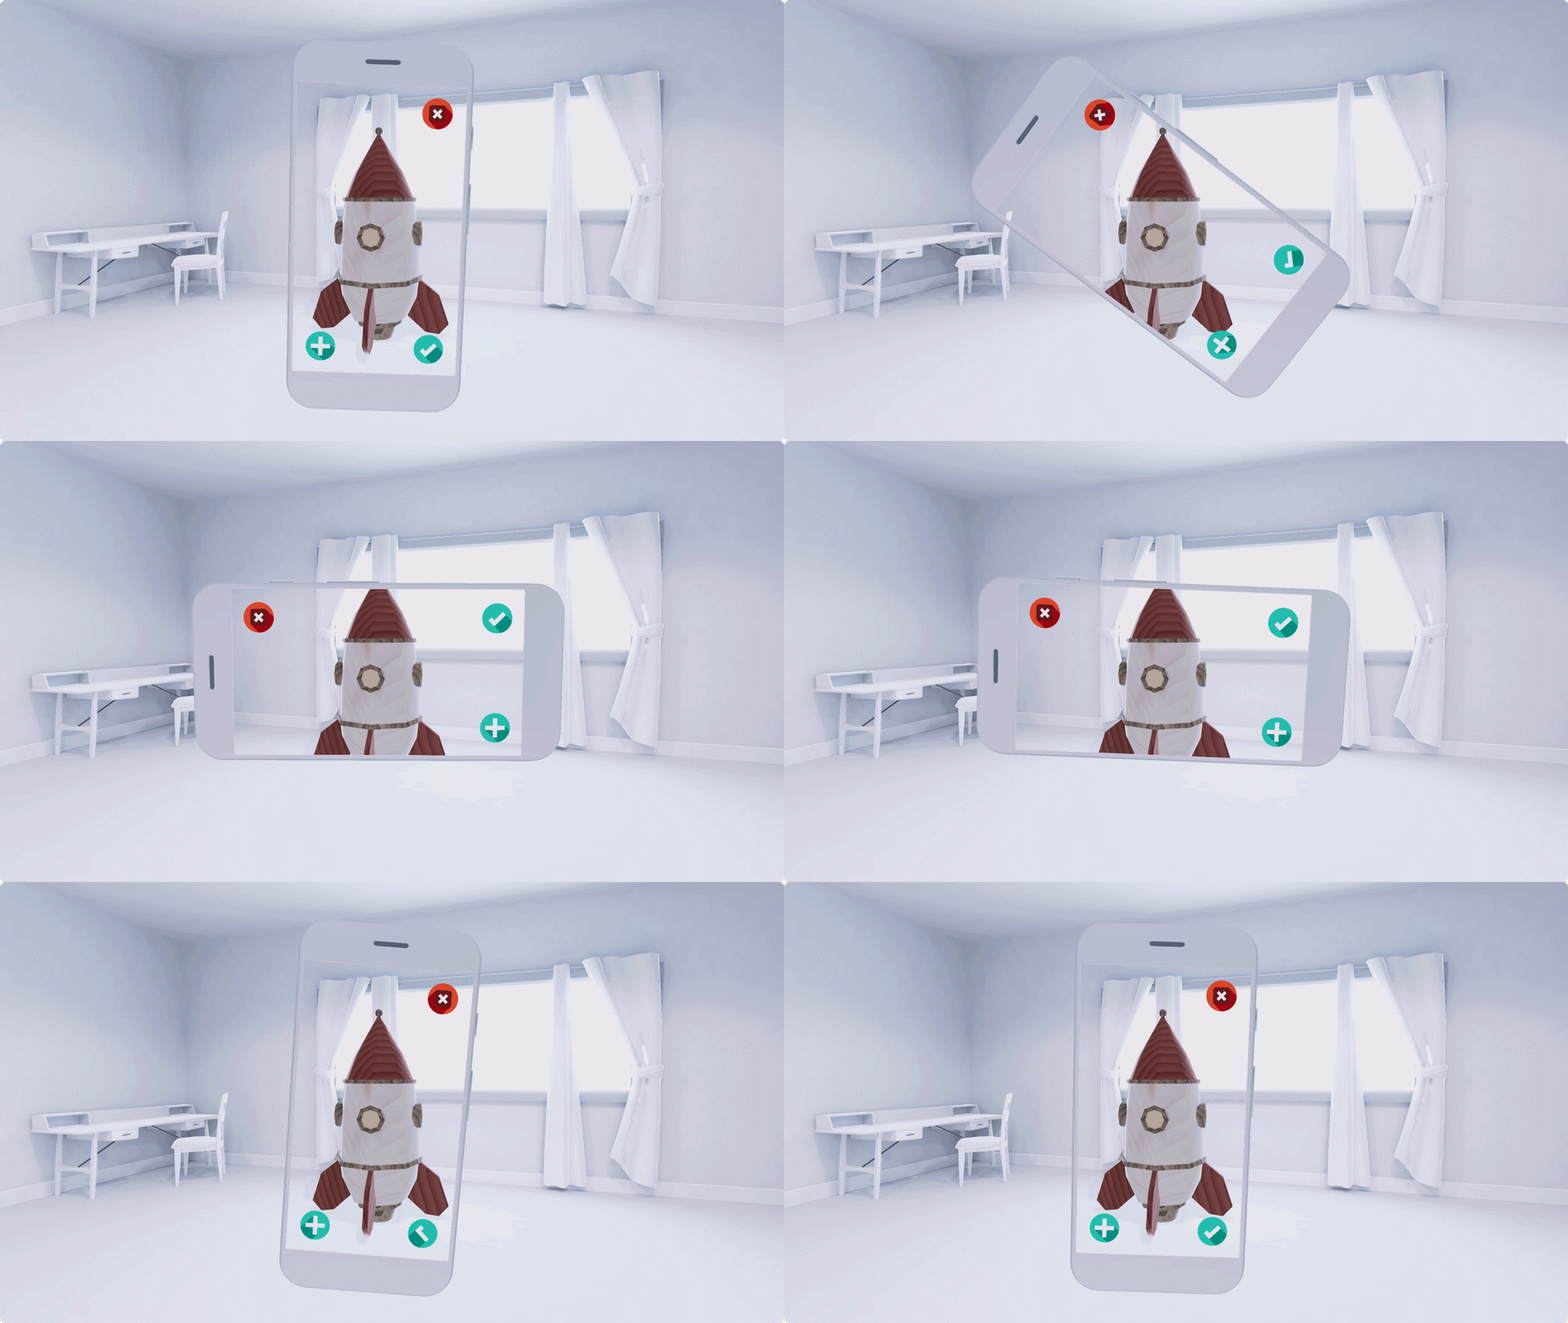
旋转界面,避免切断摄像头画面。
错误数
帮助用户从错误和错误中轻松恢复。
无论错误来自系统还是用户,都应该让用户能够轻松恢复体验。结合使用视觉提示、动画和文字,显示解决问题的清晰路径。
您可以传达出了什么问题,尤其是帮助避免将来出现该错误的情况。避免责备用户。专注于让用户采取正确的行动。
错误状态的示例包括:
- 无相机图片:在 Android 12(API 级别 31)或更高版本中,请确保在系统设置中将“屏蔽摄像头”设为“关闭”。
- 黑暗环境:太暗,无法扫描。请尝试开灯或
移到光线充足的区域。
- 用户移动设备速度过快:设备移动速度过快。尝试缓慢移动。
- 用户屏蔽了摄像头传感器:传感器似乎被屏蔽了。
请尝试移动手指或调整设备的位置。
权限
明确告知用户应用需要特定权限的原因。
请仅在用户有必要继续体验相应体验时请求权限。
清晰说明每项权限的相关性和好处。例如,如果应用需要访问相机才能使 AR 正常运行,或需要获取用户位置以进行多人游戏体验,请告知用户。
如未另行说明,那么本页面中的内容已根据知识共享署名 4.0 许可获得了许可,并且代码示例已根据 Apache 2.0 许可获得了许可。有关详情,请参阅 Google 开发者网站政策。Java 是 Oracle 和/或其关联公司的注册商标。
最后更新时间 (UTC):2025-07-26。
[null,null,["最后更新时间 (UTC):2025-07-26。"],[[["\u003cp\u003eDesign immersive UI by minimizing distractions like pop-ups and prioritizing clear visual cues within the AR environment.\u003c/p\u003e\n"],["\u003cp\u003eCraft intuitive controls and onboarding, seamlessly integrating instructions into the AR experience rather than relying on lengthy text.\u003c/p\u003e\n"],["\u003cp\u003eSupport both landscape and portrait modes for enhanced user comfort and immersion, optimizing camera and UI placement accordingly.\u003c/p\u003e\n"],["\u003cp\u003eProvide clear, user-friendly error messages with guidance on recovery, focusing on solutions instead of blame.\u003c/p\u003e\n"],["\u003cp\u003eObtain permissions thoughtfully, explaining their necessity and relevance to the user experience upfront.\u003c/p\u003e\n"]]],[],null,["# UI elements\n\n### Design UI components for immersive experiences that aim to visually blend real and virtual spaces.\n\nCreate a visually clean UI that lends itself seamlessly to the immersive experience you're building.\n\nInterface\n---------\n\n### Create a world that's immersive and easy to use\n\nImmerse users, don't distract them.\n\nTry to interrupt your AR world as little as you can. Get users into the experience, and then get out of the way.\n\nAvoid pop-ups and full-screen takeovers unless the user explicitly selects it. Buttons, 2D alerts, and notifications can distract the user from the 3D world that you're creating around them. Instead, let users focus on the scene itself.\n\nPersistent 2D overlays can also disrupt the user's immersion. It's a constant reminder that the world they're looking at isn't completely real.\n\nSudden pop-ups and quick transitions can break the immersive AR experience.\n\n### Make the controls so easy, users won't have to think about what they mean\n\nIt's best to keep the user focused on the AR experience itself. Sometimes, however, an app needs to have onscreen controls.\n\nIn those cases, make the controls as simple as possible. Ideally, a user should be able to trigger an action without looking at it. Think of the camera button on your phone. It's big, it's not labeled, and you can tap it almost without thinking about it.\n\nMaintain the continuity of the experience. Try to avoid taking the user out of a scene too often. For instance, if users need to select, customize, or share an AR object, try to figure out a way they can do it without leaving AR.\n\nOnboarding and instructions\n---------------------------\n\n### Provide an onboarding flow within the experience\n\nLet users launch AR quickly. Make your tutorial a part of the main experience flow. Avoid teaching users all the key tasks or mechanics at once.\n\nRather, show them how to perform these tasks as they show up in the game. Users won't be overloaded with information, and they'll be able to link helpful instructions and tips to the task at hand.\n\n### Guide the user visually\n\nUse a combination of visual cues, motion, and animation to teach users. Illustrate and use in-app experiences as much as possible. Text instructions can take users out of the experience and make it harder to remember what they're supposed to do.\n\nFor example, if you want users to swipe, give them an arrow or a hand icon rather than showing the word \"swipe.\"\n\n### Use familiar UI patterns\n\nTake advantage of your users' knowledge. If there's a standard UX interaction model for a certain action, such as tapping or dragging, use it! You won't have to teach the user a whole new way to perform simple tasks, and you can dive right into the important part of your experience.\n\nLandscape \\& portrait\n---------------------\n\n### Provide support for both portrait and landscape modes. If this isn't possible, select the one that's best for your experience.\n\nSupporting both modes creates a more immersive experience and increases user comfort.\n\nThink about camera and button placement for each mode. Pay attention to how camera positioning affects depth sensing, spatial awareness, and accurate surface measurements in each mode.\n\nRotate the UI and avoid cutting the camera feed.\n\nErrors\n------\n\n### Help users easily recover from missteps and errors.\n\nWhether the error came from the system or the user, make it easy to get back into the experience. Use a combination of visual cues, animation, and text to show a clear path to resolution.\n\nYou can communicate what went wrong, especially if it helps avoid that error in the future. Avoid blaming the user. Focus on getting the user to take the right action.\n\nSample error states can include:\n\n- **No camera images**: On Android 12 (API level 31) or later, make sure that \"Block Camera\" is set to OFF in system settings.\n- **Dark environment**: Too dark to scan. Try turning on the lights or moving to a well-lit area.\n- **User moving device too fast:** Device moving too fast. Try moving more slowly.\n- **User blocking the camera sensor**: Looks like the sensor is blocked. Try moving your finger or adjusting the device's position.\n\nPermissions\n-----------\n\n### Clearly tell users why the app needs certain permissions.\n\nAsk for permissions only when it's necessary for users to move forward with the experience.\n\nBe clear about the relevance and benefits of each permission. For instance, if the app needs access to the camera for AR to work, or the user's position for multiplayer experiences, let them know."]]