
Hãy làm theo các bước sau để thiết lập điểm đánh dấu nâng cao.
Lấy khoá API và bật Maps JavaScript API
Trước khi sử dụng điểm đánh dấu nâng cao, bạn cần có một dự án trên Cloud có tài khoản thanh toán và đã bật Maps JavaScript API. Để tìm hiểu thêm, hãy xem bài viết Thiết lập dự án trên đám mây của Google.
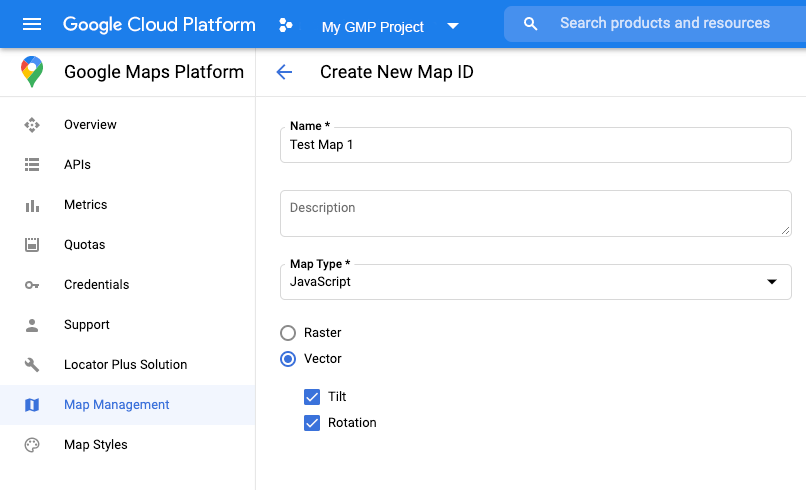
Tạo mã bản đồ
Để tạo mã bản đồ mới, hãy làm theo các bước trong phần Tuỳ chỉnh Cloud. Đặt Loại bản đồ thành JavaScript rồi chọn tuỳ chọn Vector hoặc Raster.
Cập nhật mã khởi chạy bản đồ
Bạn cần có mã bản đồ mà bạn vừa tạo. Bạn có thể tìm thấy mã này trên trang Quản lý bản đồ.
Tải thư viện điểm đánh dấu nâng cao trong hàm
asynckhi cần:const { AdvancedMarkerElement } = await google.maps.importLibrary("marker") as google.maps.MarkerLibrary;
Cung cấp mã bản đồ khi bạn tạo thực thể bản đồ bằng thuộc tính
mapId. Đây có thể là mã bản đồ mà bạn cung cấp hoặcDEMO_MAP_ID.const map = new google.maps.Map(document.getElementById('map'), { center: {lat: -34.397, lng: 150.644}, zoom: 8, mapId: 'YOUR_MAP_ID' });
Kiểm tra các chức năng của bản đồ (không bắt buộc)
Điểm đánh dấu nâng cao yêu cầu có mã bản đồ. Nếu thiếu mã bản đồ,
điểm đánh dấu nâng cao sẽ không tải được. Để khắc phục sự cố, bạn có thể thêm trình nghe mapcapabilities_changed để đăng ký nhận thông báo về các thay đổi đối với chức năng của bản đồ. Bạn không bắt buộc phải sử dụng Chức năng của bản đồ và chỉ nên sử dụng cho mục đích kiểm thử
và khắc phục sự cố hoặc cho mục đích dự phòng thời gian chạy.
// Optional: subscribe to map capability changes.
map.addListener('mapcapabilities_changed', () => {
  const mapCapabilities = map.getMapCapabilities();

  if (!mapCapabilities.isAdvancedMarkersAvailable) {
    // Advanced markers are *not* available, add a fallback.
  }
});