마커 개요
컬렉션을 사용해 정리하기
내 환경설정을 기준으로 콘텐츠를 저장하고 분류하세요.
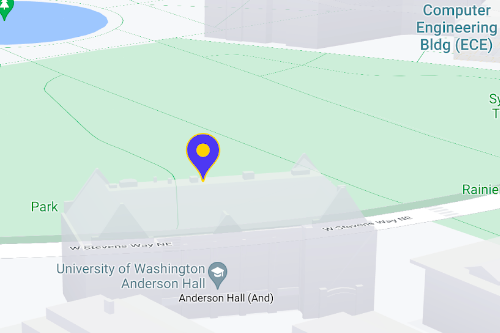
마커를 사용하여 지도에서 단일 위치를 표시하세요. 이 가이드에서는 고급 마커를 사용하는 방법을 보여줍니다. 고급 마커를 사용하면 성능이 뛰어난 마커를 만들고 맞춤설정할 수 있으며, DOM 클릭 이벤트 및 키보드 입력에 반응하는 마커를 만들 수 있습니다. 고급 마커는 완전 맞춤 마커 만들기를 비롯하여 맞춤 HTML 및 CSS 사용을 지원하므로 한층 더 세부적인 맞춤설정이 가능합니다. 3D 애플리케이션의 경우 마커가 표시되는 고도를 조정할 수 있습니다.
고급 마커는 래스터 지도와 벡터 지도 모두에서 지원됩니다 (단, 일부 기능은 래스터 지도에서 사용할 수 없음).
고급 마커를 사용하려면 지도 ID가 필요합니다 (DEMO_MAP_ID
사용 가능).
고급 마커 시작하기
색상, 크기, 아이콘 이미지 맞춤설정
기본 마커의 배경, 글리프, 테두리 색상을 맞춤설정하고 마커 크기를 조정합니다.
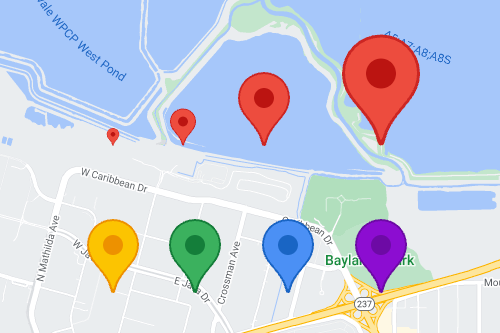
기본 마커 아이콘을 맞춤 SVG 또는 PNG 이미지로 대체합니다.
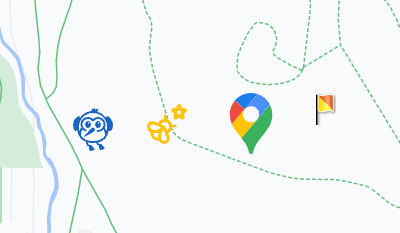
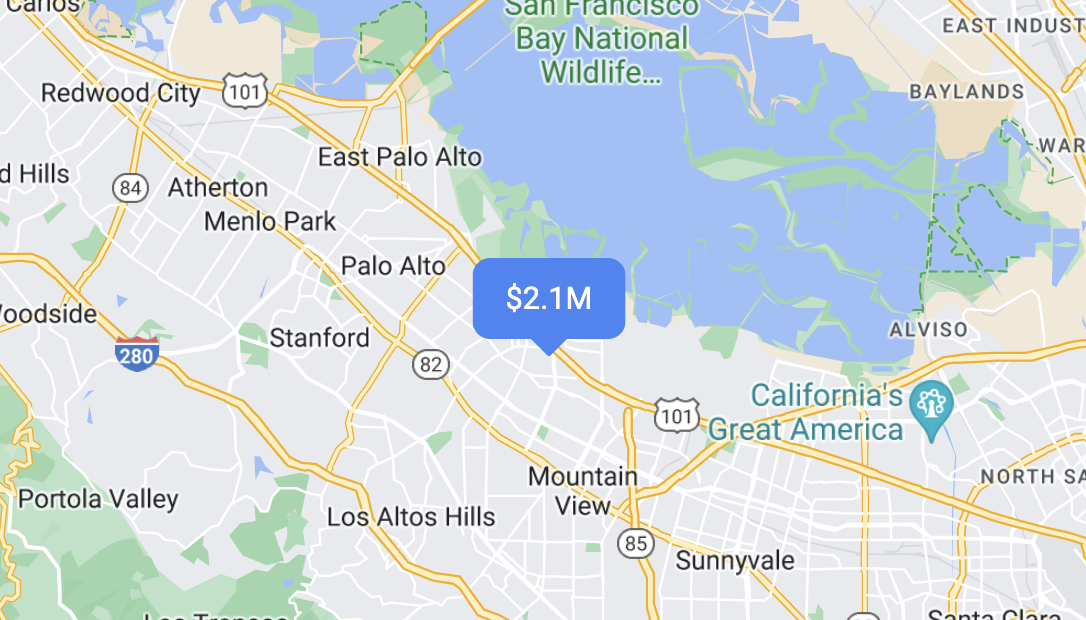
맞춤 HTML 마커 만들기
맞춤 HTML 및 CSS를 사용하여 눈에 띄는 양방향 마커를 만들고 애니메이션을 만듭니다.
마커가 클릭 및 키보드 이벤트에 반응하도록 설정
click
이벤트 리스너를 추가하여 마커가 클릭 및 키보드 이벤트에 반응하도록 설정합니다.
function initMap() {
const map = new google.maps.Map(document.getElementById('map'), {
center: {lat: 37.4239163, lng: -122.0947209},
zoom: 17,
mapId: 'DEMO_MAP_ID',
});
const marker = new google.maps.marker.AdvancedMarkerElement({
map,
position: {lat: 37.4239163, lng: -122.0947209},
});
marker.addListener('click', ({domEvent, latLng}) => {
const {target} = domEvent;
// Handle the click event.
// ...
});
}
마커 고도 및 충돌 동작 설정
마커가 3D 지도 요소와 함께 올바르게 표시되도록 고도를 설정하고, 마커가 다른 마커 또는 지도 라벨과 충돌할 때의 동작을 지정합니다. 마커 고도는 벡터 지도에서만 설정할 수 있습니다.
다음 단계
달리 명시되지 않는 한 이 페이지의 콘텐츠에는 Creative Commons Attribution 4.0 라이선스에 따라 라이선스가 부여되며, 코드 샘플에는 Apache 2.0 라이선스에 따라 라이선스가 부여됩니다. 자세한 내용은 Google Developers 사이트 정책을 참조하세요. 자바는 Oracle 및/또는 Oracle 계열사의 등록 상표입니다.
최종 업데이트: 2025-08-17(UTC)
[null,null,["최종 업데이트: 2025-08-17(UTC)"],[[["\u003cp\u003eAdvanced markers offer highly performant and customizable options for displaying single locations on Google Maps, including custom HTML and CSS for unique designs.\u003c/p\u003e\n"],["\u003cp\u003eThey are accessible, responding to DOM click events and keyboard input for enhanced user interaction.\u003c/p\u003e\n"],["\u003cp\u003eCustomization options include changing color, scale, icon image, and creating custom HTML markers with interactive elements and animations.\u003c/p\u003e\n"],["\u003cp\u003eAltitude control is available for 3D applications, enabling precise marker placement in three-dimensional spaces, although this feature is limited to vector maps.\u003c/p\u003e\n"],["\u003cp\u003eAdvanced markers are compatible with both raster and vector maps, requiring a map ID for implementation, and offer improved performance compared to legacy markers.\u003c/p\u003e\n"]]],["Advanced markers allow customization of map markers, including color, scale, and icons (SVG/PNG). Users can employ custom HTML and CSS for unique designs and animations. Markers can be made interactive via `click` event listeners, handling user clicks and keyboard input. Altitude and collision behavior can be defined for 3D maps. A map ID, like `DEMO_MAP_ID`, is needed, and these advanced markers are available on Android, iOS, and JavaScript platforms, supporting both raster and vector maps.\n"],null,["Select platform: [Android](/maps/documentation/android-sdk/advanced-markers/overview \"View this page for the Android platform docs.\") [iOS](/maps/documentation/ios-sdk/advanced-markers/overview \"View this page for the iOS platform docs.\") [JavaScript](/maps/documentation/javascript/advanced-markers/overview \"View this page for the JavaScript platform docs.\")\n\n\u003cbr /\u003e\n\nUse markers to display single locations on a map. This guide shows you how to\nuse advanced markers. With\nadvanced markers you can create and customize highly\nperformant markers, and make accessible markers that respond to DOM click events\nand keyboard input. For even deeper customization,\nadvanced markers supports the use of custom HTML and CSS,\nincluding the ability to create completely custom markers. For 3D applications\nyou can control the altitude at which a marker appears.\nAdvanced markers are supported on both raster and vector maps (though some features are not available on raster maps).\nA map ID is required to use Advanced Markers (the `DEMO_MAP_ID` can be used).\n| **Tip:** If your map uses [legacy markers](/maps/documentation/javascript/markers), consider [migrating to advanced markers](/maps/documentation/javascript/advanced-markers/migration).\n\n[Get started with advanced markers](/maps/documentation/javascript/advanced-markers/start)\n\nCustomize color, scale, and icon image\n\nCustomize the default marker's background, glyph, and border\ncolor, and adjust marker size.\n\nReplace the default marker icon with a custom SVG or PNG image.\n\nCreate custom HTML markers\n\nUse custom HTML and CSS to create visually distinctive\ninteractive markers, and create animations.\n\nMake markers respond to click and keyboard events\n\nMake a marker respond to clicks and keyboard events by adding a\n`click` event listener. \n\n```javascript\nfunction initMap() {\n const map = new google.maps.Map(document.getElementById('map'), {\n center: {lat: 37.4239163, lng: -122.0947209},\n zoom: 17,\n mapId: 'DEMO_MAP_ID',\n });\n\n const marker = new google.maps.marker.AdvancedMarkerElement({\n map,\n position: {lat: 37.4239163, lng: -122.0947209},\n });\n\n marker.addListener('click', ({domEvent, latLng}) =\u003e {\n const {target} = domEvent;\n // Handle the click event.\n // ...\n });\n}\n```\n\nSet marker altitude and collision behavior\n\nSet the altitude for a marker to make it appear correctly with\n3D map elements, and specify how a marker should behave when it collides with\nanother marker or map label. Marker altitude is only supported on vector maps.\n\nNext step\n\n- [Get started with advanced markers](/maps/documentation/javascript/advanced-markers/start)"]]