
視聴者を現実世界の場所に連れて行く魅力的な 3D ストーリーを作成してみませんか?このガイドでは、組み込みのエディタを使用して新しいストーリーを作成する方法について説明します。
直感的なインターフェースを使用して、タイトル、説明、画像、カメラアングルを調整します。初心者の方に最適です。
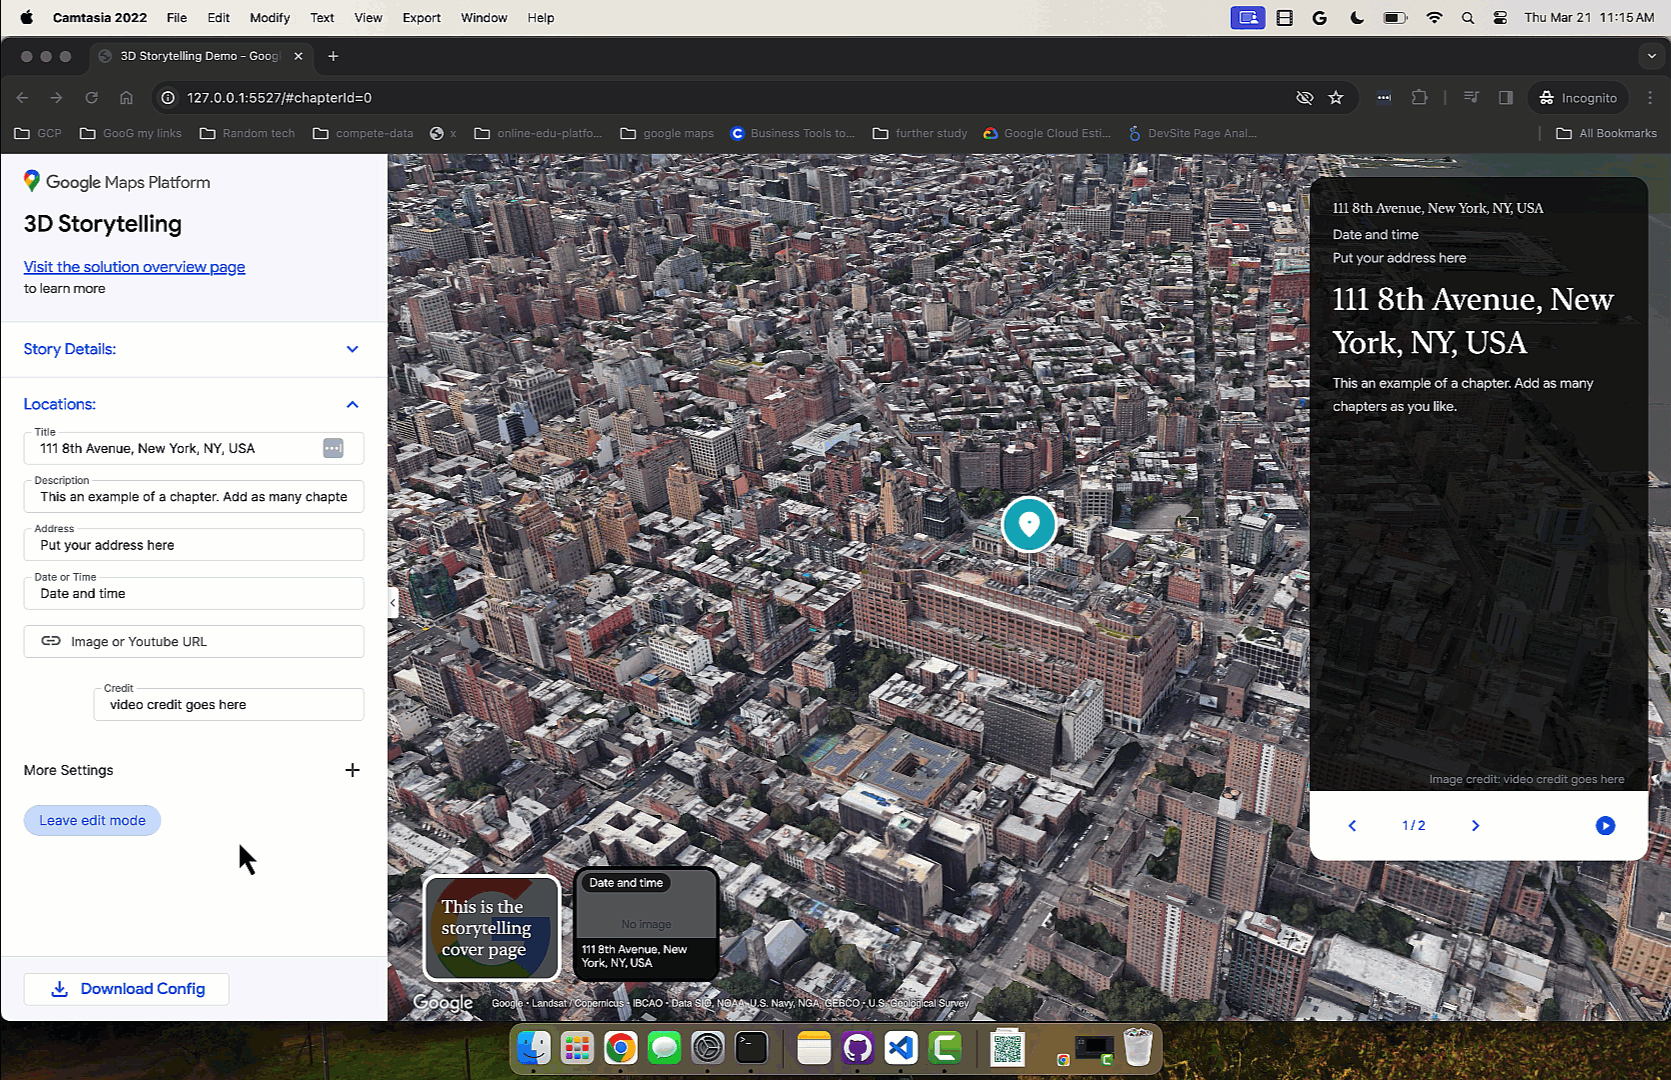
ストーリー エディタを開く
3D ストーリーテリング ソリューションには、UI からストーリーを作成できる組み込みのエディタが付属しています。
エディタはページの左側にあります。この小さいアイコンをクリックして開きます。
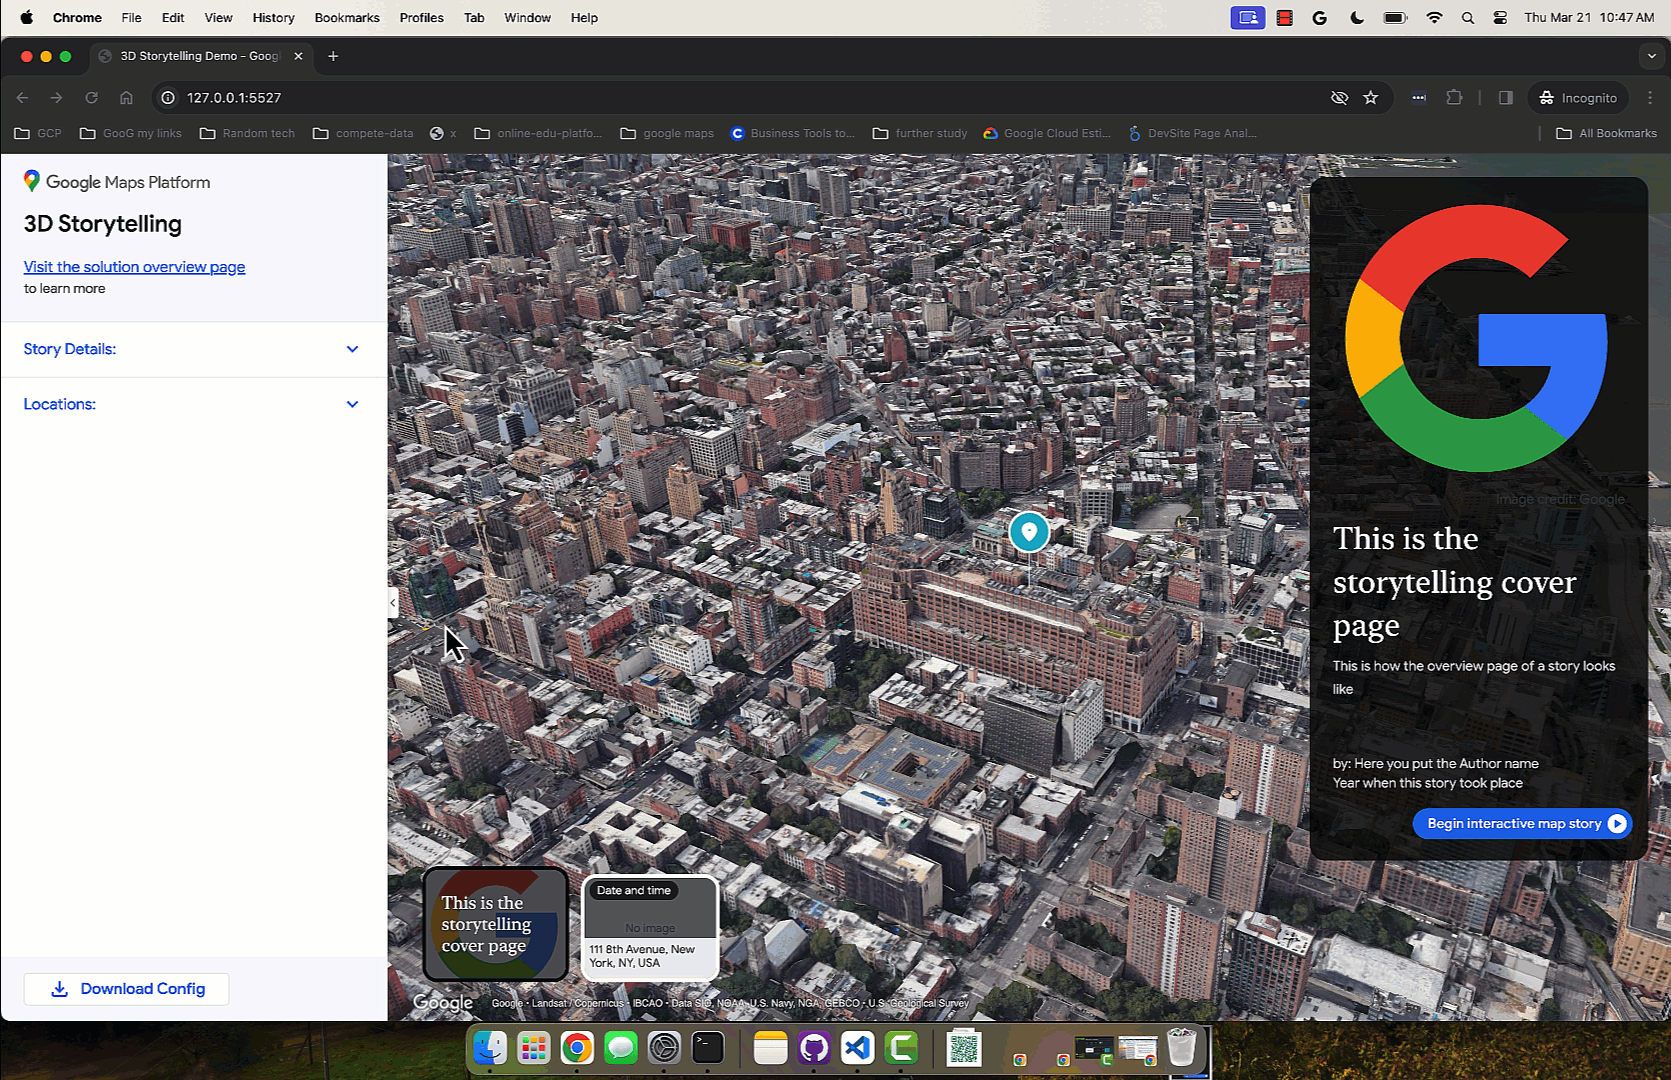
エディタにアクセスするには、ホスト版の 3D Storytelling 管理アプリにアクセスするか、GitHub から独自の Storytelling インスタンスをダウンロードしてインストールします。
表紙を作成する
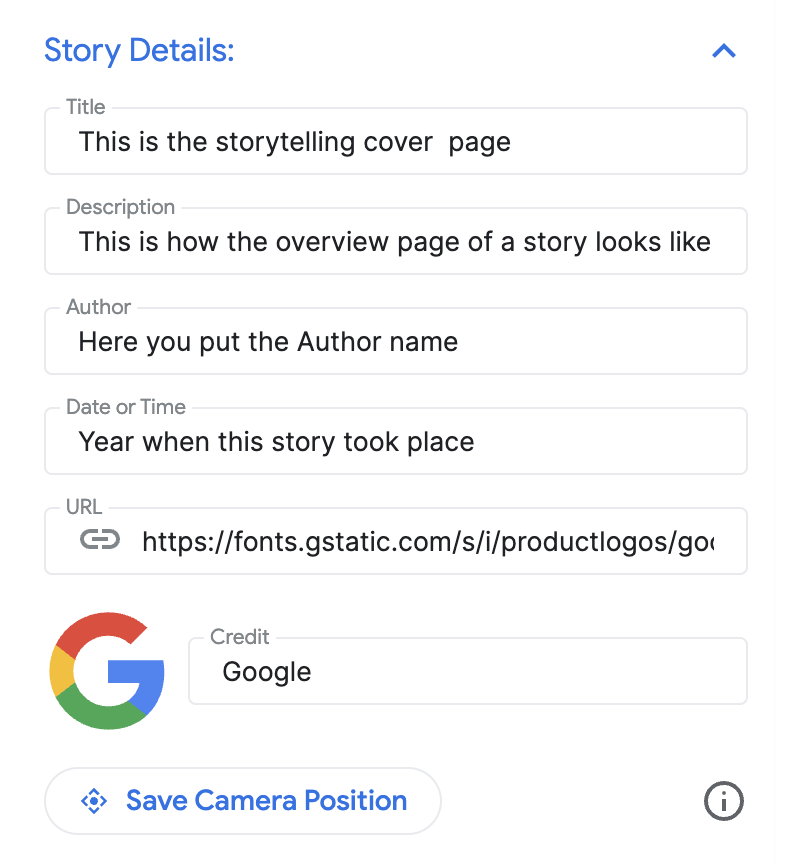
[ストーリーの詳細] セクションで、タイトル、画像、説明などの詳細を設定します。これにより、視聴者にストーリーを紹介できます。
チャプターの追加
各章は、旅の途中の立ち寄り場所のようなものです。追加方法は次のとおりです。
組み込みのオートコンプリート検索バーを使用して場所を検索します。
場所を追加したら、場所の横にある [編集] ボタンをクリックして、チャプターの詳細を追加できます。

[編集] をクリックして、チャプターのタイトル、説明、画像、日付を入力します。

特定のチャプターを削除する場合は、[編集] ボタンのすぐ下にある [削除] ボタンをクリックします。
左側の点線アイコンを使用してドラッグ&ドロップすると、チャプターの順序を変更できます。

チャプターを保存する
特定のチャプターを保存するには、[編集モードを終了] ボタンをクリックします。[編集モードを終了] ボタンは保存ボタンとして機能します。

カメラの設定をカスタマイズする
さまざまなカメラ設定をカスタマイズできます。
位置マーカーの表示/非表示 特定の場所のピンを表示するのではなく、一般的な地域を表示したい場合があります。[位置マーカーを表示] チェックボックスをオンまたはオフにして、ピンを表示または非表示にします。
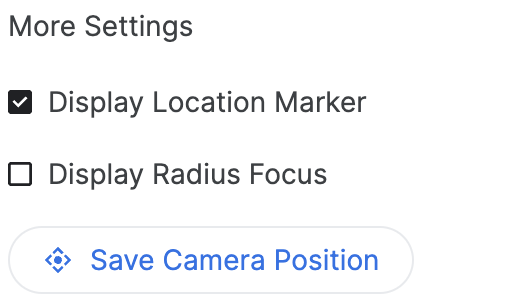
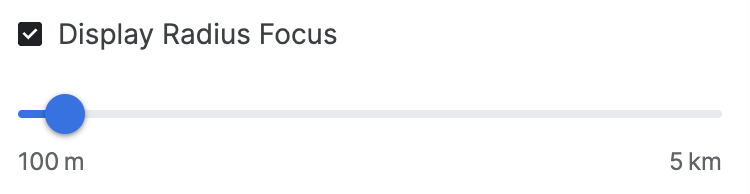
エリアの半径を表示する: [半径フォーカスを表示] 機能を使用すると、特定の場所を中心とするエリアを表示できます。チェックすると、カメラのフォーカスの境界半径を制御できる半径スライダーが開きます。
高度なカメラ オプションがカスタマイズされたエクスペリエンスの作成にどのように役立つかを示します。
カメラの位置をカスタマイズする: カメラの操作を簡単に行い、表示したいカメラの角度を微調整できます。
傾斜: 地図を上から見たり、地上レベルで見たりできます。Ctrl キー(一部のパソコンでは Cmd キー)を押しながら、マウスで上下にクリックしてドラッグします。
回転: 地図を回転させて 360 度のビューを表示します。Control キー(一部のパソコンでは Cmd キー)を押しながら、マウスでクリックして左右にドラッグします。
ズーム: アップまたは広角で表示します。マウスのスクロール ホイールまたは使い慣れたズームイン/ズームアウトのジェスチャーを使用します。
傾斜、回転、ズームを組み合わせて、各場所の最適な角度を見つけてください。コントロールは、パソコンの設定によって若干異なる場合があります。

3D キャンバスを操作して、最適なカメラアングルを見つける方法をご確認ください。
完了してダウンロード
ストーリーとチャプターが作成されたら、構成をダウンロードします。
[ダウンロード] をクリックして、カスタマイズした構成を JSON 形式で取得します。
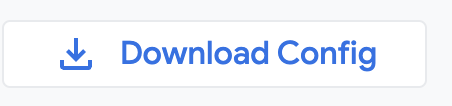
この構成を使用すると、GitHub からコードをフォークして、独自の 3D ストーリーテリングを作成できます。