
พร้อมที่จะสร้างเรื่องราว 3 มิติที่น่าสนใจซึ่งจะพาผู้ชมไปสำรวจสถานที่จริงแล้วใช่ไหม คู่มือนี้จะแสดงวิธีสร้างเรื่องราวใหม่โดยใช้ เครื่องมือแก้ไขในตัว
ใช้อินเทอร์เฟซที่ใช้งานง่ายเพื่อปรับชื่อ คำอธิบาย รูปภาพ และมุมกล้อง เหมาะสำหรับผู้เริ่มต้น
เปิดตัวแก้ไขเรื่องราว
โซลูชันการเล่าเรื่องแบบ 3 มิติมาพร้อมกับโปรแกรมแก้ไขในตัวที่ให้คุณ สร้างเรื่องราวจาก UI
เครื่องมือแก้ไขจะอยู่ทางด้านซ้ายของหน้า เปิดโดยคลิกไอคอนเล็กๆ นี้
คุณเข้าถึงเครื่องมือแก้ไขได้โดยไปที่เวอร์ชันที่โฮสต์ของแอปผู้ดูแลระบบการเล่าเรื่องแบบ 3 มิติ หรือโดยการ ดาวน์โหลดและติดตั้งอินสแตนซ์การเล่าเรื่องของคุณเองจาก GitHub
สร้างหน้าปก
ใช้ส่วน "รายละเอียดสตอรี่" เพื่อตั้งชื่อ รูปภาพ คำอธิบาย และรายละเอียดอื่นๆ ซึ่งจะช่วยให้ผู้ชมรู้จักเรื่องราวของคุณ

เพิ่มส่วนเนื้อหา
แต่ละบทเปรียบเสมือนจุดแวะพักในเส้นทางของคุณ วิธีเพิ่มมีดังนี้
ค้นหาสถานที่โดยใช้แถบค้นหาของการเติมข้อความอัตโนมัติในตัว
เมื่อเพิ่มสถานที่แล้ว คุณจะเพิ่มรายละเอียดลงในบทได้โดยคลิกปุ่มแก้ไขข้างสถานที่นั้น

คลิก "แก้ไข" เพื่อป้อนชื่อ คำอธิบาย รูปภาพ และวันที่สำหรับ บท

หากต้องการลบส่วนใดส่วนหนึ่ง คุณจะเห็นปุ่มลบอยู่ใต้ปุ่มแก้ไข
คุณจัดลำดับบทใหม่ได้โดยการลากและย้ายโดยใช้ไอคอนจุดไข่ปลาทางด้านซ้าย

บันทึกส่วนของเนื้อหา
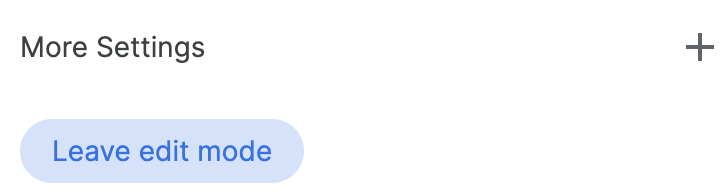
หากต้องการบันทึกตอนใดตอนหนึ่ง ให้คลิกปุ่ม "ออกจากโหมดแก้ไข" ปุ่มออกจากโหมดแก้ไขจะทำหน้าที่เป็นปุ่มบันทึก
ปรับแต่งการตั้งค่ากล้อง
คุณปรับแต่งการตั้งค่ากล้องต่างๆ ได้ดังนี้
แสดง/ซ่อนเครื่องหมายตำแหน่ง คุณอาจไม่ต้องการ แสดงหมุดในตำแหน่งที่เฉพาะเจาะจง แต่ต้องการแสดงพื้นที่ทั่วไป เลือก/ยกเลิกการเลือกช่อง "แสดงเครื่องหมายตำแหน่ง" เพื่อแสดงหรือซ่อนหมุด
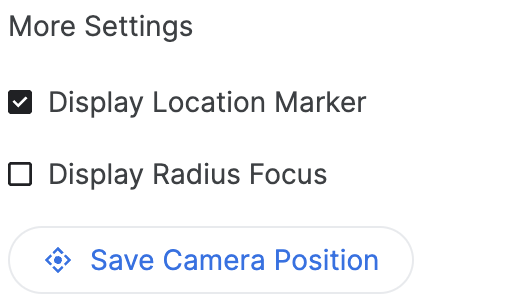
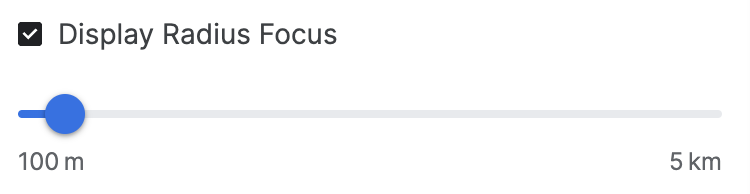
แสดงรัศมีรอบพื้นที่ คุณเลือกแสดงพื้นที่รอบ สถานที่ตั้งที่เฉพาะเจาะจงได้โดยใช้ฟีเจอร์ "แสดงโฟกัสรัศมี" เมื่อเลือกตัวเลือกนี้ แถบเลื่อนรัศมีจะเปิดขึ้นเพื่อให้คุณควบคุมรัศมีขอบเขต ของโฟกัสกล้องได้
วิดีโอนี้แสดงให้เห็นว่าตัวเลือกกล้องขั้นสูงช่วยสร้างประสบการณ์การใช้งานที่ปรับแต่งแล้วได้อย่างไร
ปรับแต่งตำแหน่งกล้อง ปรับมุมกล้องที่ต้องการแสดงอย่างละเอียดด้วยการควบคุมกล้องที่ง่ายดาย
เอียง: ดูแผนที่จากด้านบนหรือที่ระดับพื้นดิน กดปุ่ม Control ค้างไว้ (หรือ Cmd ในคอมพิวเตอร์บางเครื่อง) ขณะคลิกและลากขึ้นหรือลงด้วย เมาส์
หมุน: หมุนแผนที่เพื่อดูมุมมอง 360 องศา กดแป้น Control ค้างไว้ (หรือ Cmd ในคอมพิวเตอร์บางเครื่อง) ขณะคลิกและลากไปทางซ้ายหรือขวาด้วยเมาส์
ซูม: ดูมุมมองระยะใกล้หรือมุมกว้าง ใช้ปุ่มลูกกลิ้งของเมาส์ หรือท่าทางสัมผัสซูมเข้า/ออกที่คุ้นเคย
ทดลองใช้การผสมผสานการเอียง หมุน และซูมเพื่อหามุมที่สมบูรณ์แบบสำหรับ แต่ละตำแหน่ง การควบคุมอาจแตกต่างกันเล็กน้อย ขึ้นอยู่กับ การตั้งค่า</0x0A>คอมพิวเตอร์

ดูวิธีควบคุม Canvas 3 มิติเพื่อให้ได้มุมกล้องที่สมบูรณ์แบบ
ทำให้เสร็จสมบูรณ์และดาวน์โหลด
เมื่อสร้างเรื่องราวและบทแล้ว ให้ดาวน์โหลดการกำหนดค่า
คลิก "ดาวน์โหลด" เพื่อรับการกำหนดค่าที่ปรับแต่งแล้วในรูปแบบ JSON
คุณสามารถใช้การกำหนดค่านี้เพื่อสร้างการเล่าเรื่องแบบ 3 มิติของคุณเองได้โดยการ Fork โค้ดจาก GitHub