本快速入门将以互动方式介绍如何使用 Earth Engine 代码编辑器可视化和分析地理空间数据。
准备工作
注册或创建 Google Cloud 项目;系统会提示您完成以下步骤。如果您已注册有 Earth Engine 访问权限的项目,请跳至下一部分。
- 选择项目的用途:商业用途或非商业用途。
- 如果用途是非商业用途,请选择项目类型。
- 创建新的 Google Cloud 项目或选择现有项目。
- 如果用途为商业用途,请验证您的项目或为其设置结算功能。
- 确认您的项目信息。
注意:如果您不打算保留在此过程中创建的资源,请创建新的项目,而不要选择现有的项目。完成本教程介绍的步骤后,您可以删除项目,并移除项目拥有的所有资源。
欢迎使用代码编辑器
Earth Engine 代码编辑器是一个基于网络的交互式开发环境,可让您直接在浏览器中访问 Earth Engine 并直观呈现结果。它提供了用于管理脚本、资产和导出任务的工具,并使用 Earth Engine JavaScript 客户端库以 JavaScript 编写分析。该界面包含代码编辑器、地图显示屏和控制台,可立即提供反馈和进行检查。
开始使用
1. 如需开始使用,请访问 code.earthengine.google.com。首次访问 Code Editor 时,您可能会看到一个导览,其中重点介绍了 Code Editor 的不同功能。
2. 前往右上角的登录 widget,并确保选择了您为本快速入门设置的项目。如果不是,请从菜单中选择“更改 Cloud 项目”,然后按照提示搜索并选择该项目。
3. 在以下部分中,将每个代码块复制到编辑器面板中,点击“运行”,然后在 Map 或控制台中检查结果。每一步都基于之前的步骤,因此请逐步添加代码,而不要移除之前的代码块。
将光栅数据添加到地图
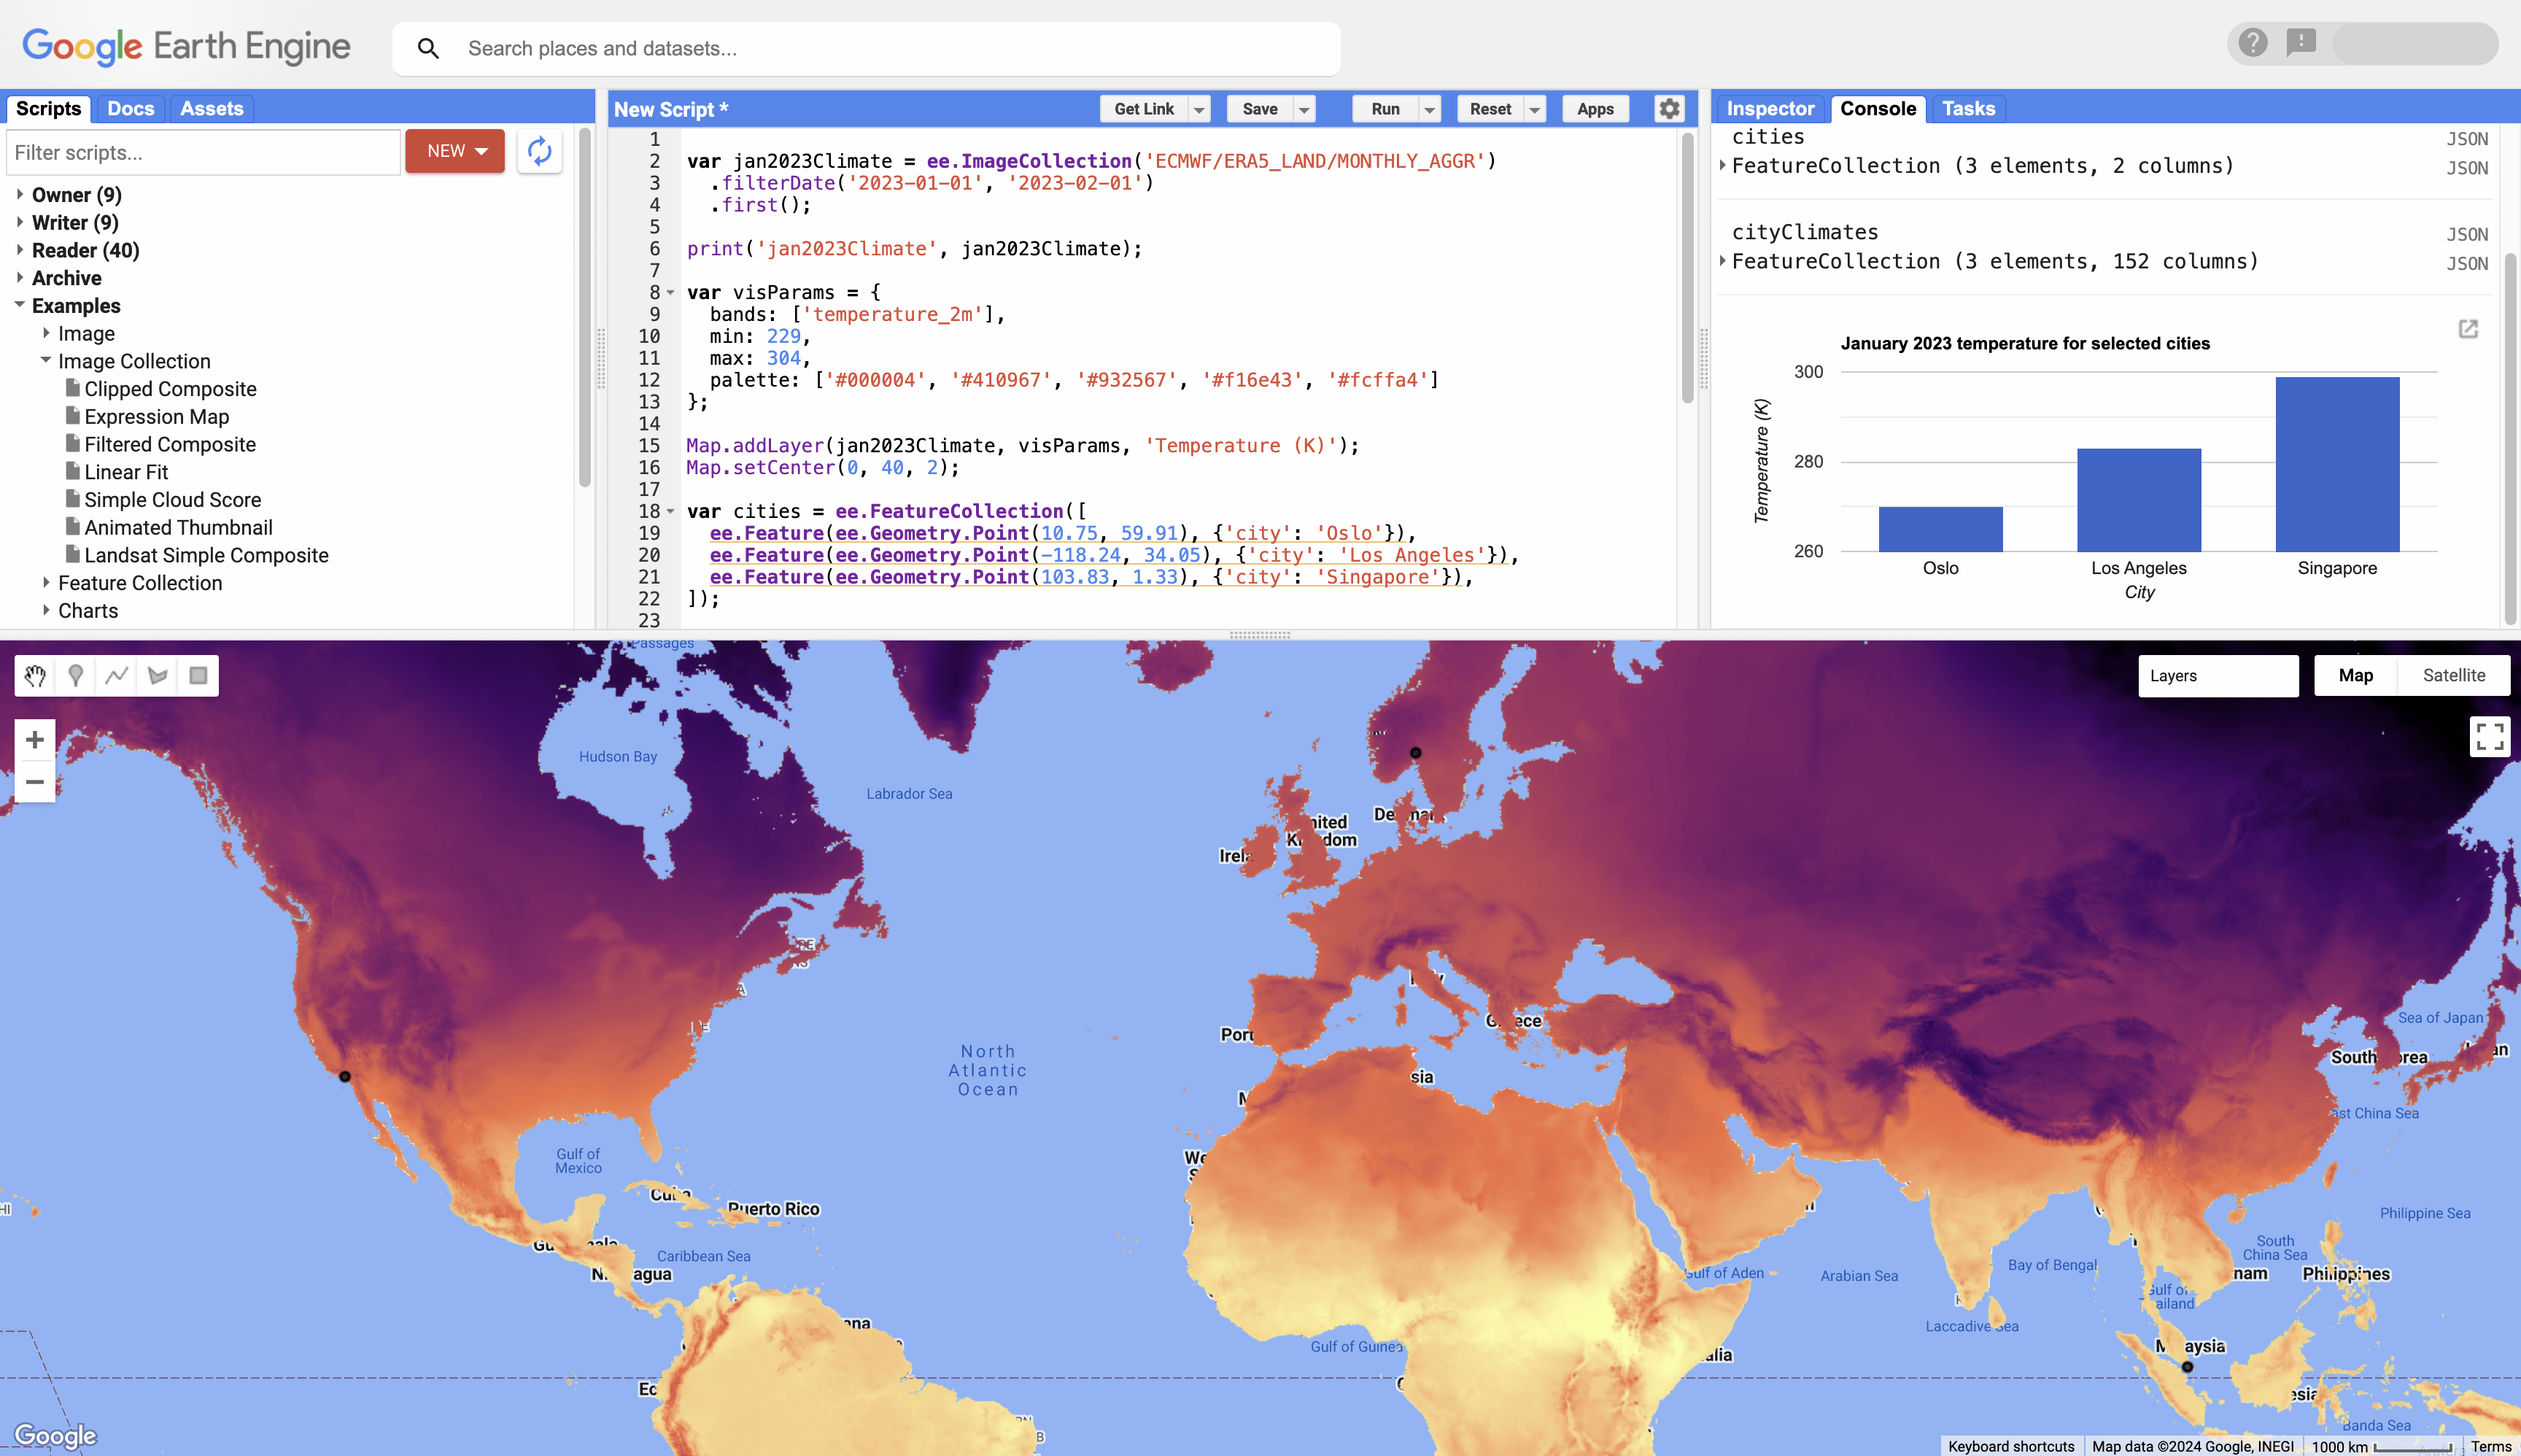
1. 加载指定时间段的气候数据并显示其元数据。
var jan2023Climate = ee.ImageCollection('ECMWF/ERA5_LAND/MONTHLY_AGGR')
  .filterDate('2023-01-01', '2023-02-01')
  .first();

print('jan2023Climate', jan2023Climate);
2. 将温度带作为图层添加到具有特定可视化属性的地图 widget。
var visParams = {
  bands: ['temperature_2m'],
  min: 229,
  max: 304,
  palette: ['#000004', '#410967', '#932567', '#f16e43', '#fcffa4']
};

Map.addLayer(jan2023Climate, visParams, 'Temperature (K)');
Map.setCenter(0, 40, 2);
向地图添加矢量数据
1. 创建一个包含三个城市点的矢量数据对象。
var cities = ee.FeatureCollection([
  ee.Feature(ee.Geometry.Point(10.75, 59.91), {'city': 'Oslo'}),
  ee.Feature(ee.Geometry.Point(-118.24, 34.05), {'city': 'Los Angeles'}),
  ee.Feature(ee.Geometry.Point(103.83, 1.33), {'city': 'Singapore'}),
]);

print('cities', cities);
2. 将城市位置添加到地图中,然后重新运行脚本以显示它。
Map.addLayer(cities, null, 'Cities');
提取数据并绘制图表
1. 提取这三个城市的气候数据;结果会添加到输入 FeatureCollection 中。
var cityClimates = jan2023Climate.reduceRegions(cities, ee.Reducer.first());

print('cityClimates', cityClimates);
2. 将各个城市的温度绘制为条形图。
var chart = ui.Chart.feature.byFeature(cityClimates, 'city', 'temperature_2m')
  .setChartType('ColumnChart')
  .setOptions({
    title: 'January 2023 temperature for selected cities',
    hAxis: {title: 'City'},
    vAxis: {title: 'Temperature (K)'},
    legend: {position: 'none'}
  });

print(chart);
后续步骤
- 详细了解代码编辑器的功能。
- 了解如何使用 Earth Engine 的对象和方法分析数据。
- 了解 Earth Engine 的处理环境。
- 了解 Earth Engine 的机器学习功能。
- 了解如何将计算结果导出到 BigQuery。