面板
ui.Panel 是一个用于排列 widget 的上层界面容器。每个 ui.Panel 都有一个 ui.Panel.Layout 对象,用于控制其微件在屏幕上的排列方式。如需了解详情,请参阅“布局”部分。面板还会维护已添加到其中的微件(可能包括其他面板)的列表。如需在面板中管理 widget,请从面板中 add() 或 remove() 它们,或通过在面板上调用 widgets() 检索 widget 列表。微件列表是 ui.data.ActiveList 的实例,这意味着您可以通过操控列表及其中的微件来配置面板。
ui.root
ui.root 是水平条下方代码编辑器中所有内容的 ui.Panel 固定实例。默认情况下,它仅包含一个微件:默认地图。具体而言,ui.root.widgets().get(0) 中的项是默认显示在代码编辑器中的 Map 对象(ui.Map 的实例)。除了 Map 别名之外,默认地图的唯一其他特殊之处在于,它包含几何图形编辑工具。如需获取用于构建界面的空白画布,请从 ui.root clear() 默认映射:
Code Editor (JavaScript)
ui.root.clear();
或者,您也可以通过向根面板添加微件来修改根面板中的默认地图。具体而言,请将地图视为具有绝对布局的面板(如需了解详情,请参阅“布局”部分)。以下示例展示了对默认地图的修改:
Code Editor (JavaScript)
// Load a VIIRS surface reflectance image and display on the map.
var image = ee.Image('NOAA/VIIRS/001/VNP09GA/2022_06_05').select('M.*');
Map.addLayer(image, {bands: ['M5', 'M4', 'M3'], min: 0, max: 4e3, gamma: 1.5});

// Create the title label.
var title = ui.Label('Click to inspect');
title.style().set('position', 'top-center');
Map.add(title);

// Create a panel to hold the chart.
var panel = ui.Panel();
panel.style().set({
  width: '400px',
  position: 'bottom-right'
});
Map.add(panel);

// Register a function to draw a chart when a user clicks on the map.
Map.style().set('cursor', 'crosshair');
Map.onClick(function(coords) {
  panel.clear();
  var point = ee.Geometry.Point(coords.lon, coords.lat);
  var chart = ui.Chart.image.regions(image, point, null, 30);
  chart.setOptions({title: 'Band values'});
  panel.add(chart);
});
请注意,该示例通过将默认地图(即 Map)视为面板并向其添加微件来修改默认地图。由于地图采用绝对布局,因此地图上 widget 的位置由 widget 的 style 属性的 position 属性决定。如需了解详情,请参阅绝对布局部分。
当您与其他用户共享 Code Editor 链接时,默认情况下,ui.root 会占据窗口的大部分空间,文本编辑器、文档面板和控制台会隐藏起来。通过控制 ui.root 布局,您可以控制其他用户对脚本的体验。
布局
布局用于控制面板中微件的排列方式。有两种布局选项,如下所述:流式布局和绝对布局。布局使用 ui.Panel.Layout 类指定。在构造函数中或使用 setLayout() 设置面板的布局。微件的添加顺序决定了微件在采用流布局的面板中的排列方式。每个微件的 style 的 position 属性决定了微件在采用绝对布局的面板中的排列方式。如果 widget 的样式与其所放置的布局无关,则系统会忽略该样式。
流程
流布局会以行 ('horizontal') 或列 ('vertical') 的形式显示微件。微件会按照添加到面板中的顺序排列。例如,请考虑添加到面板中的以下按钮:
Code Editor (JavaScript)
// Create a panel with vertical flow layout.
var panel = ui.Panel({
  layout: ui.Panel.Layout.flow('vertical'),
  style: {width: '300px'}
});

// Add a bunch of buttons.
for (var i = 0; i < 30; i++) {
  panel.add(ui.Button({label: 'Button ' + i, style: {stretch: 'horizontal'}}));
}

ui.root.clear();
ui.root.add(panel);
垂直布局应如下所示:
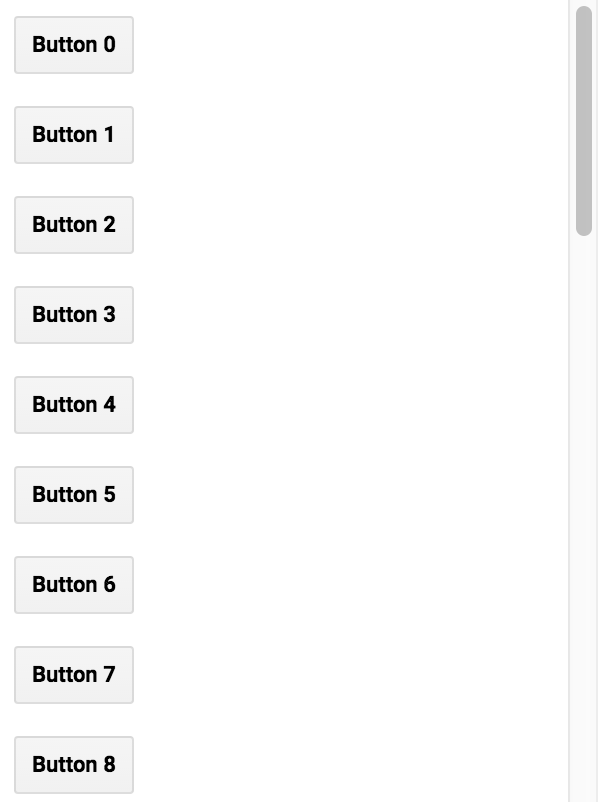
请注意,面板的 width 设置为 300 像素,stretch 使用 style 属性设置为 'horizontal'。stretch 样式属性适用于采用流布局的面板中的微件。例如,{stretch: 'horizontal'} 表示 widget 将展开即可填满面板内的可用水平空间。在上面的示例中,将流布局类型更改为 'horizontal',即可看到按钮以行而不是列的形式排列。
在水平流式面板中,水平拉伸的 widget 会展开,以填充所有其他 widget 占据其自然宽度后可用的空间。如果有多个 widget 水平拉伸,则可用水平空间会在它们之间拆分。垂直拉伸的 widget 会展开即可填充面板的高度。
在垂直流式面板中,垂直拉伸的 widget 会在所有其他 widget 占据其自然高度后展开,以填充可用空间。如果有多个 widget 垂直拉伸,则可用的垂直空间会在它们之间拆分。水平拉伸的 widget 会展开即可填满面板的宽度。
绝对
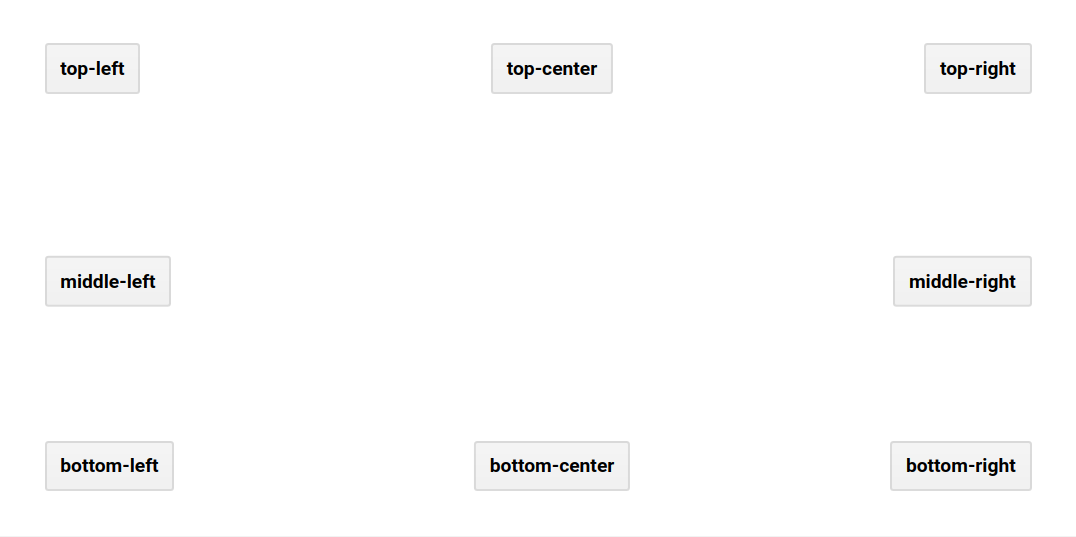
绝对布局会根据面板中的位置来定位微件。与流布局不同,微件的显示位置由微件的 style 属性的 position 属性决定,而不是微件添加到面板的顺序。以下示例演示了如何将 root.ui 面板与绝对布局搭配使用(根面板的布局默认为水平流式布局,但可以使用 ui.root.setLayout() 进行设置):
Code Editor (JavaScript)
ui.root.clear();
ui.root.setLayout(ui.Panel.Layout.absolute());

// A function to make buttons labeled by position.
function makeButton(position) {
  return ui.Button({
    label: position,
    style: {position: position}
  });
}

// Add labeled buttons to the panel.
ui.root.add(makeButton('top-left'));
ui.root.add(makeButton('top-center'));
ui.root.add(makeButton('top-right'));
ui.root.add(makeButton('middle-left'));
ui.root.add(makeButton('middle-right'));
ui.root.add(makeButton('bottom-left'));
ui.root.add(makeButton('bottom-center'));
ui.root.add(makeButton('bottom-right'));
绝对布局面板应如下所示:
widgets()
当您向面板添加微件时,系统会将该微件添加到面板的微件列表中。对面板调用 widgets() 会返回 ui.data.ActiveList,您可以使用该 ui.data.ActiveList 来操控面板中的 widget。请考虑以下示例,该示例会向面板添加微件,将面板添加到根面板,然后在用户点击地图时更新图表:
Code Editor (JavaScript)
// Load and display NDVI data.
var ndvi = ee.ImageCollection('NOAA/VIIRS/001/VNP13A1')
    .filterDate('2021-01-01', '2022-01-01').select('NDVI');
Map.addLayer(
  ndvi.median(), {min: 0, max: 10000, palette: ['99c199', '006400']}, 'NDVI');

// Configure the map.
Map.setCenter(-94.84497, 39.01918, 8);
Map.style().set('cursor', 'crosshair');

// Create an empty panel in which to arrange widgets.
// The layout is vertical flow by default.
var panel = ui.Panel({style: {width: '400px'}})
    .add(ui.Label('Click on the map'));

// Set a callback function for when the user clicks the map.
Map.onClick(function(coords) {
  // Create or update the location label (the second widget in the panel)
  var location = 'lon: ' + coords.lon.toFixed(2) + ' ' +
                 'lat: ' + coords.lat.toFixed(2);
  panel.widgets().set(1, ui.Label(location));

  // Add a red dot to the map where the user clicked.
  var point = ee.Geometry.Point(coords.lon, coords.lat);
  Map.layers().set(1, ui.Map.Layer(point, {color: 'FF0000'}));

  // Create a chart of NDVI over time.
  var chart = ui.Chart.image.series(ndvi, point, ee.Reducer.mean(), 200)
      .setOptions({
        title: 'NDVI Over Time',
        vAxis: {title: 'NDVI'},
        lineWidth: 1,
        pointSize: 3,
      });

  // Add (or replace) the third widget in the panel by
  // manipulating the widgets list.
  panel.widgets().set(2, chart);
});

// Add the panel to the ui.root.
ui.root.add(panel);
在此示例中,请注意,首先,使用 add() 将微件添加到面板。在注册为映射点击的回调函数中,系统会改为修改 panel 的 widget 列表。具体而言,第三个微件(可能存在,也可能不存在)的设置会显示一个新的图表,其中显示了 NDVI 随时间的变化情况。如需详细了解事件处理函数,请参阅“事件”页面。